

Alerts are how InfraNest tells you when something needs attention — a monitor going down, a certificate about to expire, a domain that's close to lapsing. This article is for anyone setting up where those alerts go, or trying to figure out why one isn't arriving. You set up destinations once, then choose which alerts go where.
Overview
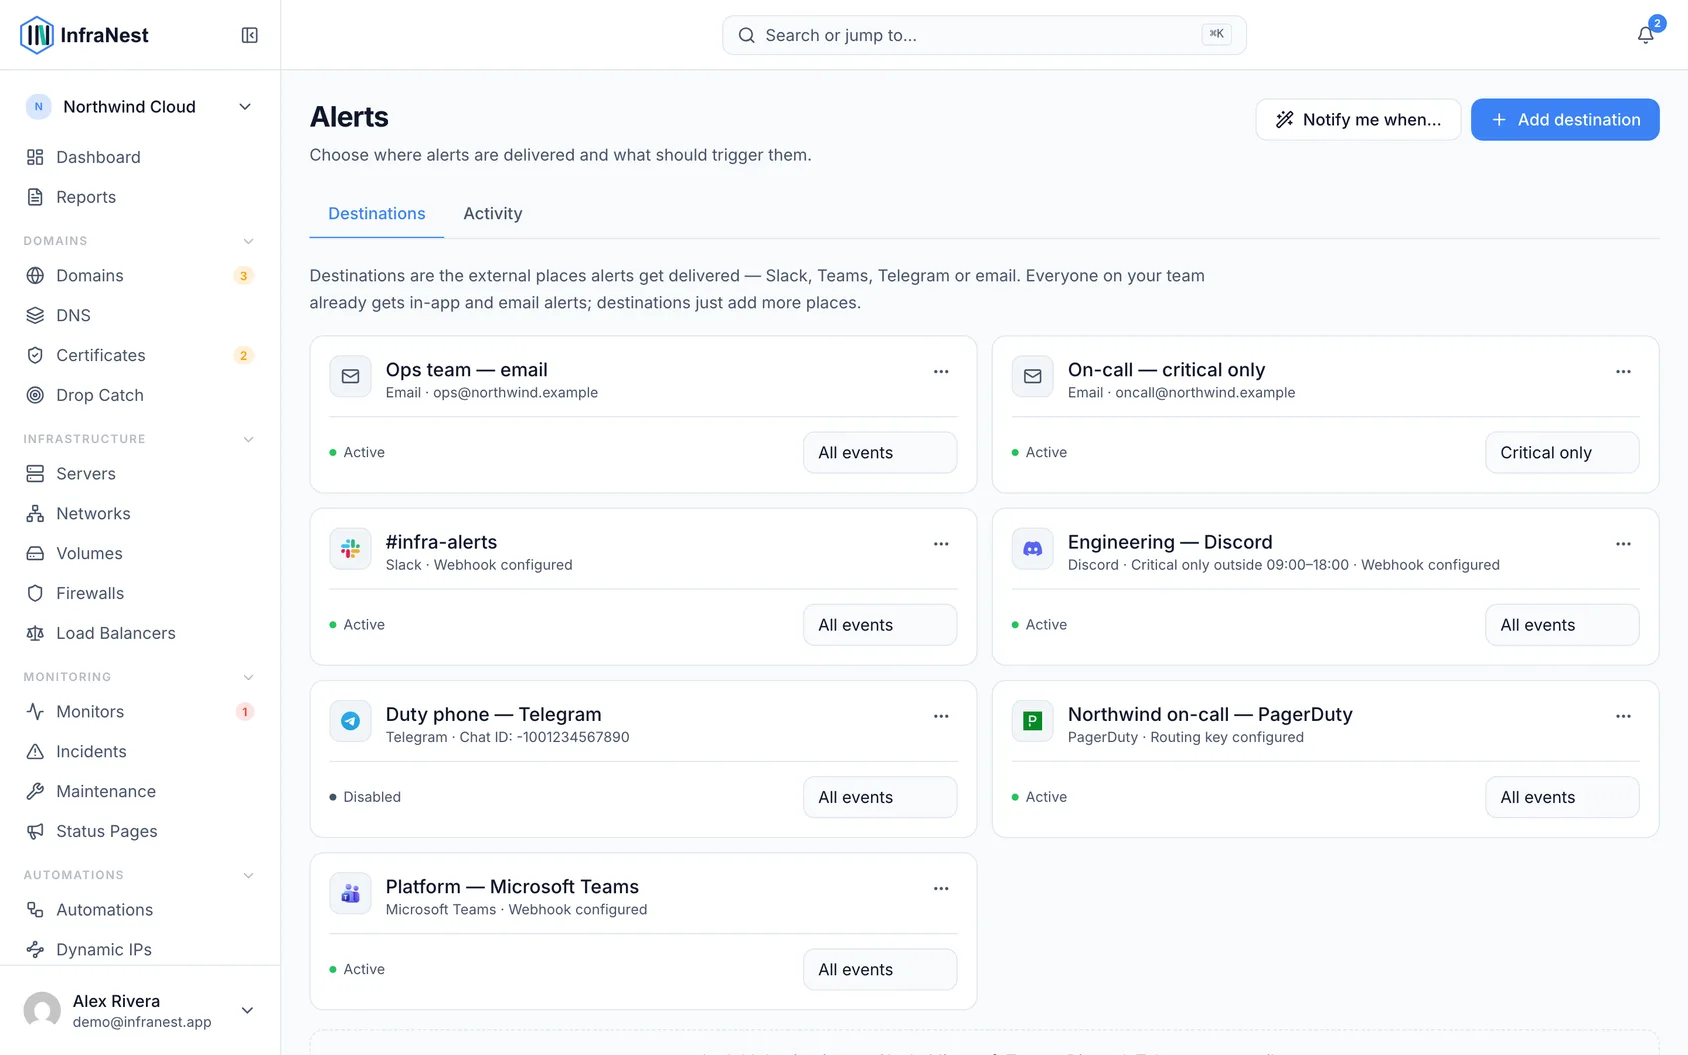
- A destination is somewhere an alert gets delivered — email, Slack, Microsoft Teams, Telegram, Discord, or a webhook.
- You attach destinations to the things you want to monitor (a monitor, server, DNS zone or domain), and can route by severity so only the important stuff reaches certain places.
- If a destination stops accepting alerts, InfraNest flags it and keeps quietly retrying — it fixes itself once the underlying problem is resolved.
Add a destination
- Go to Alerts, then Destinations.
- Select Add destination (or Add your first destination if you don't have one yet).
- Choose the type of destination — email, Slack, Microsoft Teams, Telegram, Telegram (Custom Bot), Discord, or a webhook.
- Fill in the details for that destination (for example, an email address, a Slack webhook URL, or an Incoming webhook URL). Each type has its own connect guide under Integrations.
- Give it a clear Destination name so your team recognises it later.
- Select Save & test to confirm it's working.
TipUse Send test any time from an existing destination's settings to check it's still receiving alerts.
Choose where alerts go
- Open the monitor, server, DNS zone or domain you want to configure.
- Find its alert or notification settings.
- Select the destinations that should receive alerts for this item.
- If you only want the destination to hear important events, set it to Critical only (or Critical only outside {from}–{to} for quiet hours).
- Save your changes.
NoteEven a destination set to Critical only or with quiet hours will still receive the all-clear once an outage it was told about has recovered — so you're never left thinking something is still down.
Check delivery history
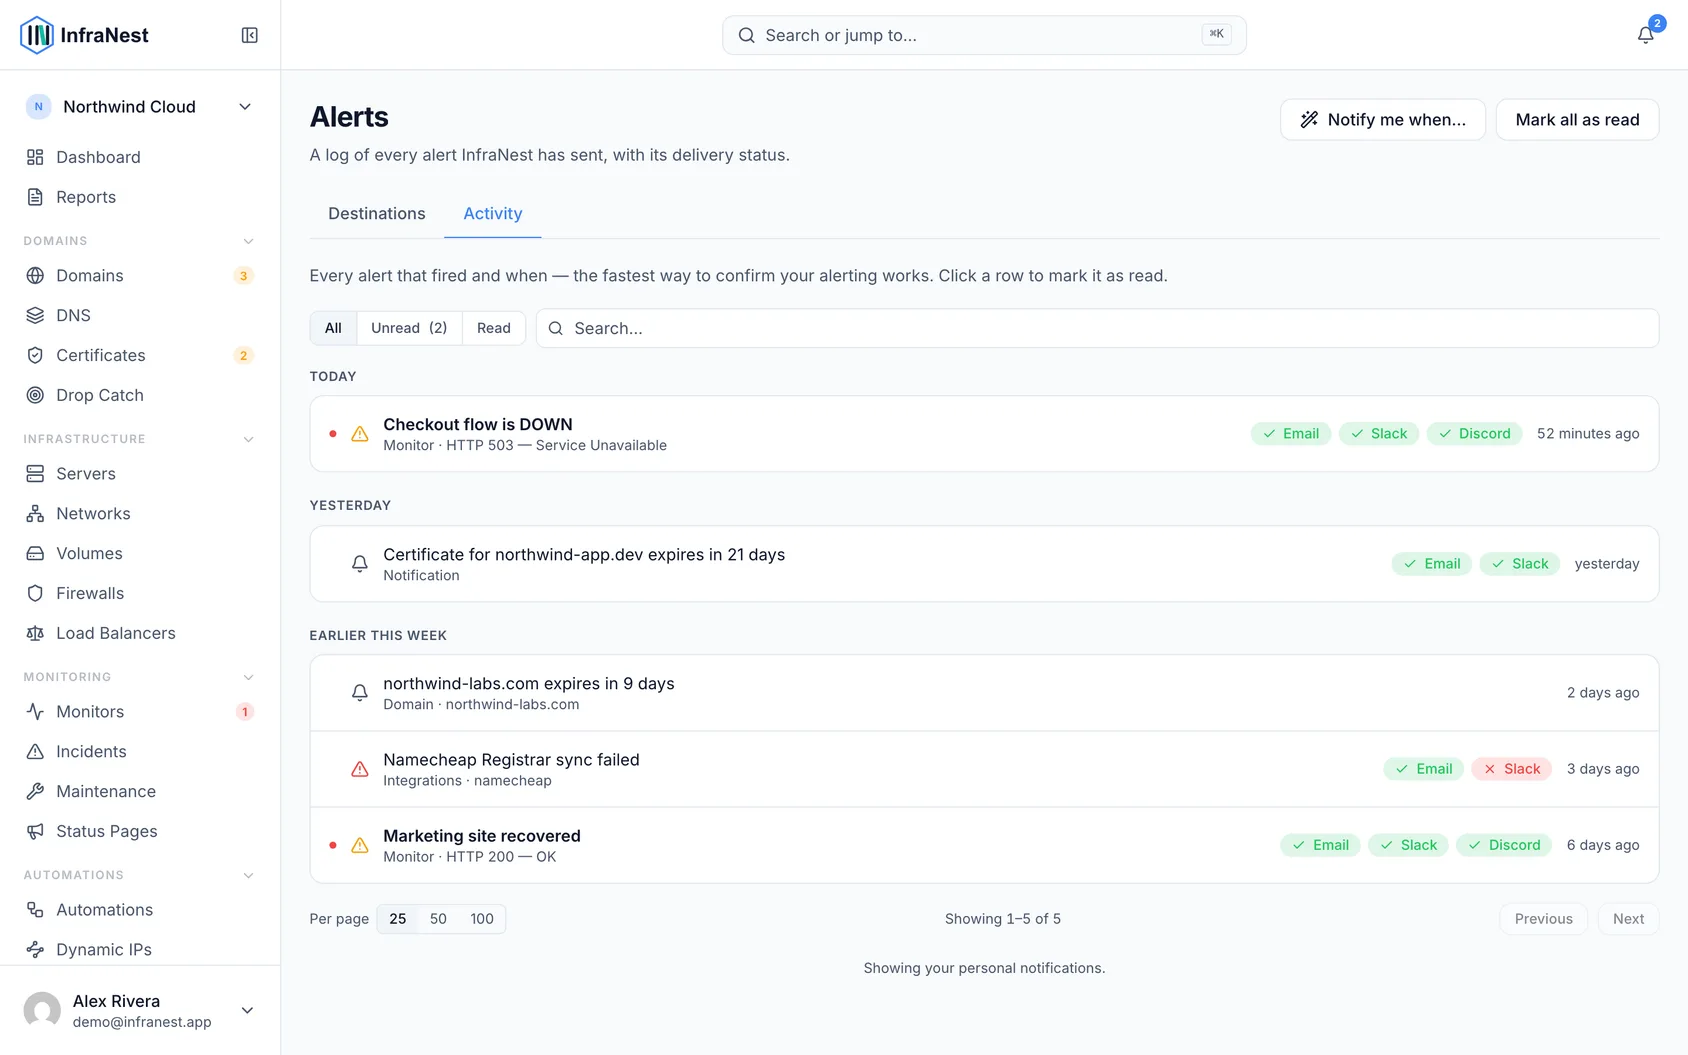
- Go to Alerts, then open the Activity tab.
- Review the timeline of alerts that have been sent — what fired, when, and where it went.
- Use this to confirm an alert was delivered, or to review recent history when something seems off.
Stop getting one kind of alert by email
- Open the alert email you want to stop.
- Scroll to the link at the bottom.
- If it's your own personal destination, select Disable this notification (or use your mail app's own Unsubscribe button — it does the same thing).
- To turn it back on later, go to your account settings, then Notifications, find the destination, and select Turn back on.
NoteIf the alert went to a shared address (like a team inbox), there's no unsubscribe link on purpose — one click could silently stop alerts for the whole team. Instead the email links to Manage this alert destination, so someone can make that change deliberately.
Silence a noisy server from an email
- Open the server alert email — for a metric over threshold, or a server that has stopped reporting.
- Select the link offering to silence that server for 60 minutes.
- On the confirmation page that opens, press the button to confirm. Nothing is silenced until you do this.
- The server keeps being monitored the whole time — if it's still in trouble an hour later, you'll hear about it again. Everything else keeps alerting normally.
- To check or end the silence early, go to Maintenance — it appears as a window named after the server.
WarningThe silence link in an alert email only works for one week, then stops working — so an old email can't be used to mute a server months later.
Troubleshooting
A destination says it is not delivering. This usually means the service on the other end rejected InfraNest's alerts — for example, a webhook URL that was regenerated, or a key that was revoked. The destination is marked Not delivering, and the owner is told by email and in the notifications bell. It stays switched on, and InfraNest keeps trying, so it starts working again on its own once you fix the underlying issue (like updating the webhook URL or key).
Good to know
- Destinations can be personal (just yours) or shared with your organisation.
- Alerts also appear in the in-app notifications bell.
- To change which emails you personally receive, check your notification preferences under your account settings — that's separate from destination setup.
- Security, billing and account emails never carry an unsubscribe link, since they're not alerts — they're things you need to be told, like a failed payment or a sign-in from a new device.
Was this article helpful?