

InfraNest can set up your monitoring, alerts, and more automatically once you connect your first provider — this is for anyone who'd rather not configure things by hand.
Overview
- Once you connect a cloud account, a registrar, or a DNS provider, InfraNest reads what's already there.
- It then offers to set the rest up for you — nothing is configured without your say-so.
- You review a plain-language list of what will be created before anything happens.
Connect your first provider
- If you haven't connected anything yet, InfraNest has nothing to look at, so it will ask you to connect one thing first.
- Pick one of the suggested kinds of connections — these match what you told InfraNest you manage.
- Select Connect an account to link it.
- Come back to this page — everything else happens automatically from here.
Review what InfraNest found and suggests
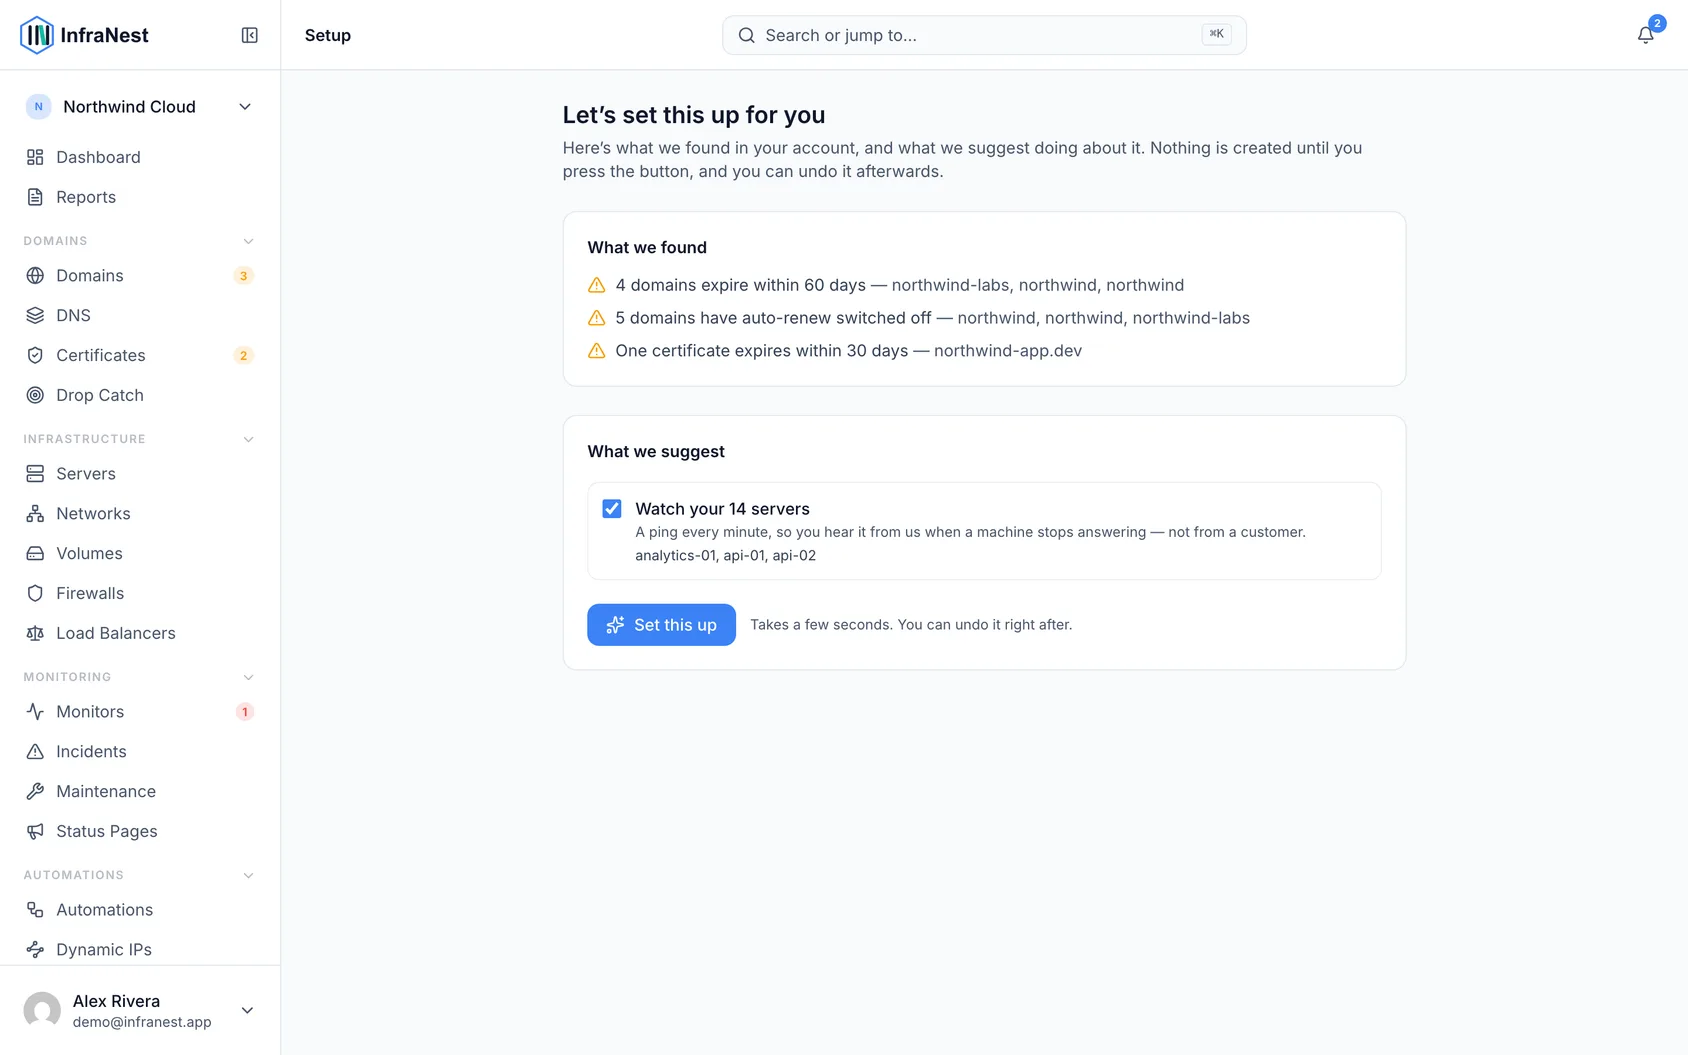
- Read What we found — this lists facts about your own infrastructure, such as domains expiring soon, domains with auto-renew switched off, and certificates about to run out. Worth reading even if you don't set anything up.
- Read What we suggest — a short list of things InfraNest would create, each with a plain explanation: watching the websites you already have, pinging your servers every minute, and sending alerts to your email address.
- Notice that drafting a status page is left unticked on purpose. This is about what you tell your customers, so it's your choice. Even if you tick it, the page stays unpublished until you publish it yourself.
- Untick anything you don't want.
- Select Set this up to create the ticked items.
NoteInfraNest never creates anything that costs money, registers a domain, or is visible to the public without your action.
Undo a setup
- After you select Set this up, look for the Undo button.
- Select Undo to remove exactly what was just created — nothing else is affected.
- Do this within 24 hours — after that, Undo is no longer available.
Confirm your alerts work
- If InfraNest sets up email alerts for you, check your inbox — a test message is sent straight away.
- Confirm it arrived. This is how you know real warnings will reach you when something goes wrong.
Set things up again later
- Open Set this up any time you like.
- Anything already in place is left out of the suggestions automatically.
- Connect a second provider whenever you're ready — you'll only be offered the new things, so you won't end up with duplicates.
Tips
TipIf your plan has a limit — say, room for ten monitors but twelve websites — InfraNest will offer as many as your plan allows and tell you the list was shortened.
Was this article helpful?
Related articles
Keyboard shortcutsInfraNest works from the keyboard, so you can move around and act on things without reaching for the mouse.Search and jump aroundInfraNest has a quick command menu so you can jump to any page or find help without clicking through the menus.Getting helpHelp is built into InfraNest — you can read guidance for whatever page you're on without leaving it.Getting started with InfraNestWelcome to InfraNest. When you sign up, a short setup wizard gets your workspace ready, and your dashboard then guides you through the first few things to do.