

This article is for anyone trying to connect InfraNest to another tool and unsure which direction the connection should go — a quick guide to incoming endpoints and outgoing webhooks.
#Overview
- These two features point in opposite directions, so picking the right one saves a lot of guessing.
- An incoming endpoint lets another tool start something in InfraNest.
- An outgoing webhook lets InfraNest tell another tool that something happened.
- The short version: incoming is a doorbell somebody else presses; outgoing is us ringing theirs.
#Which one do you want?
| Incoming endpoint | Outgoing webhook | |
|---|---|---|
| Direction | another tool → InfraNest | InfraNest → another tool |
| You give out | a URL InfraNest generates | a URL the other tool gives you |
| Use it to | let something else start an automation | tell something else that an event happened |
| Set up in | Integrations → Custom webhook, under URLs we give you | the tool's page (Custom webhook, Zapier, Make, n8n or Power Automate), under Where events go |
#Set up an incoming endpoint
An incoming endpoint is a private URL InfraNest creates for you. When another system sends data to it, any automation that starts with the Incoming webhook trigger runs, with whatever that system sent available to the rule.
Use one when a tool you already have should be able to start something here — for example, a deployment finishes and you want a maintenance window opened, or a form is submitted and you want a domain watched.
- Go to Integrations → Custom webhook.
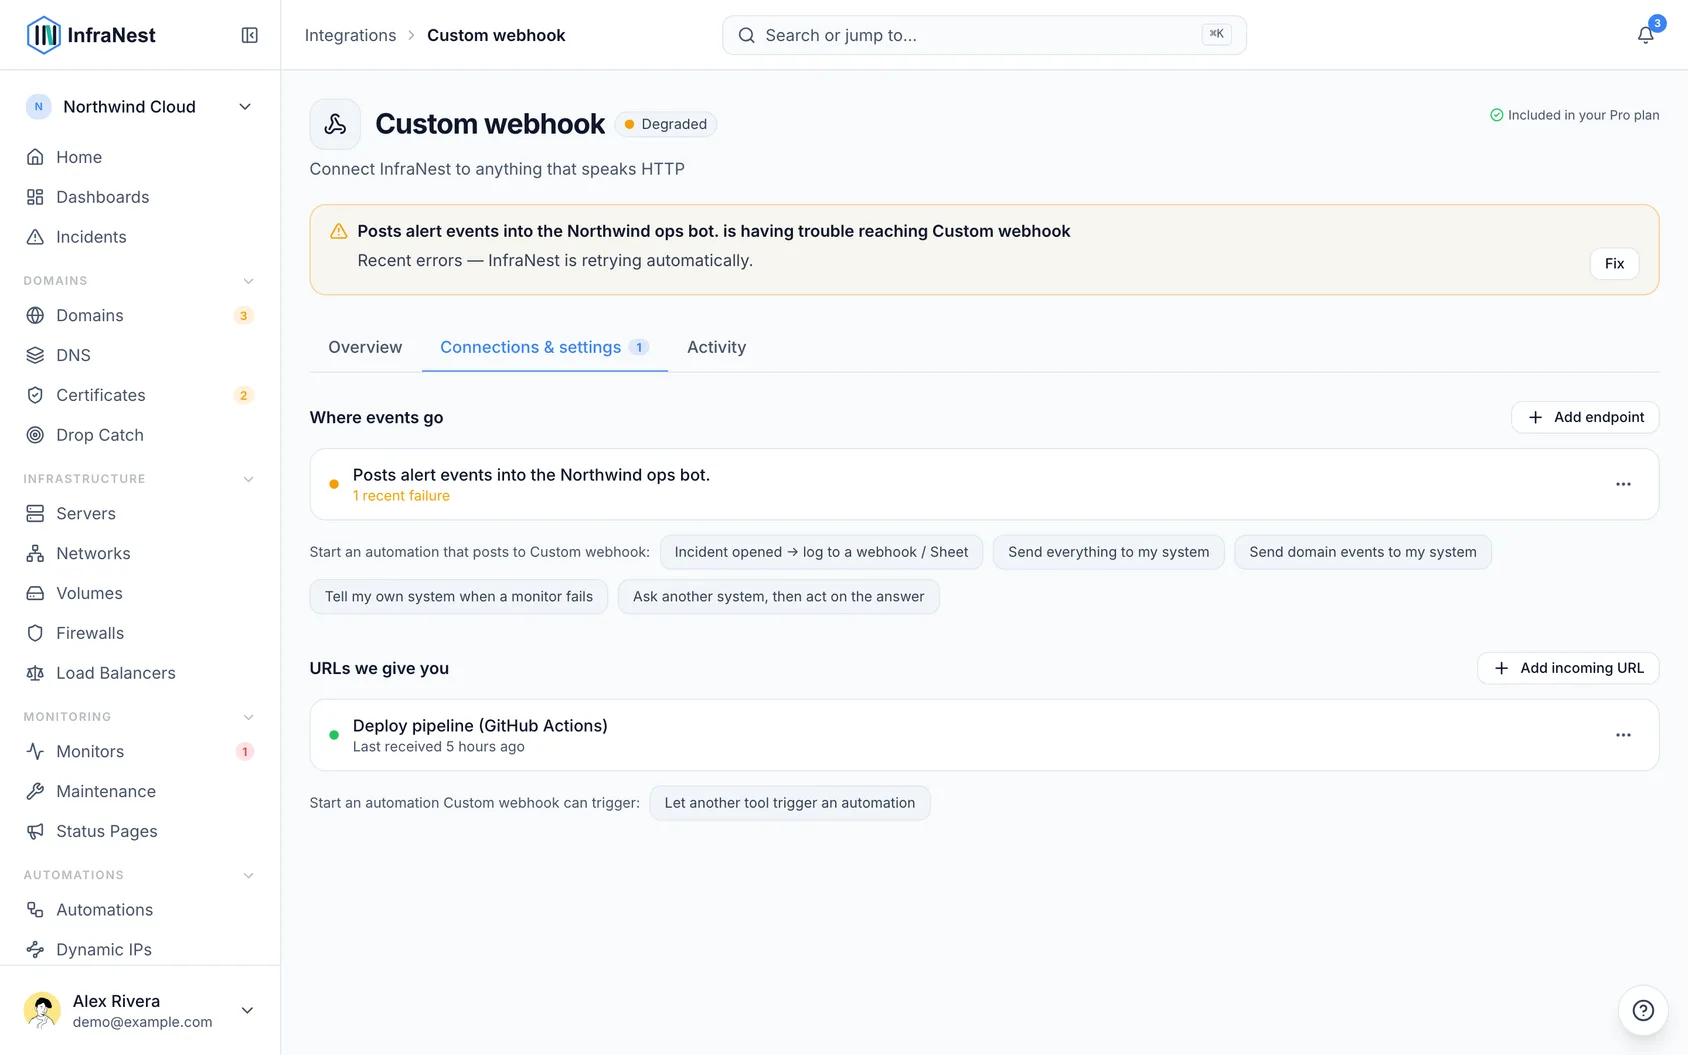
- Find the URLs we give you section.
- Create a new endpoint and give it a clear name, so you can tell at a glance which tool it belongs to.
- Optionally set a Shared secret (optional) as a second lock on the URL.
- Copy the generated URL and paste it into the other tool's settings.
- Build or point an automation at this endpoint using the Incoming webhook trigger, matching it by name.
Each endpoint's page shows its URL, the automations that react to it, and What has arrived: every call, including ones that were turned away and why — a wrong shared secret, or a URL that's switched off. Use Accept calls to this URL to turn an endpoint off without touching the others, and Regenerate URL if the URL ever leaks.
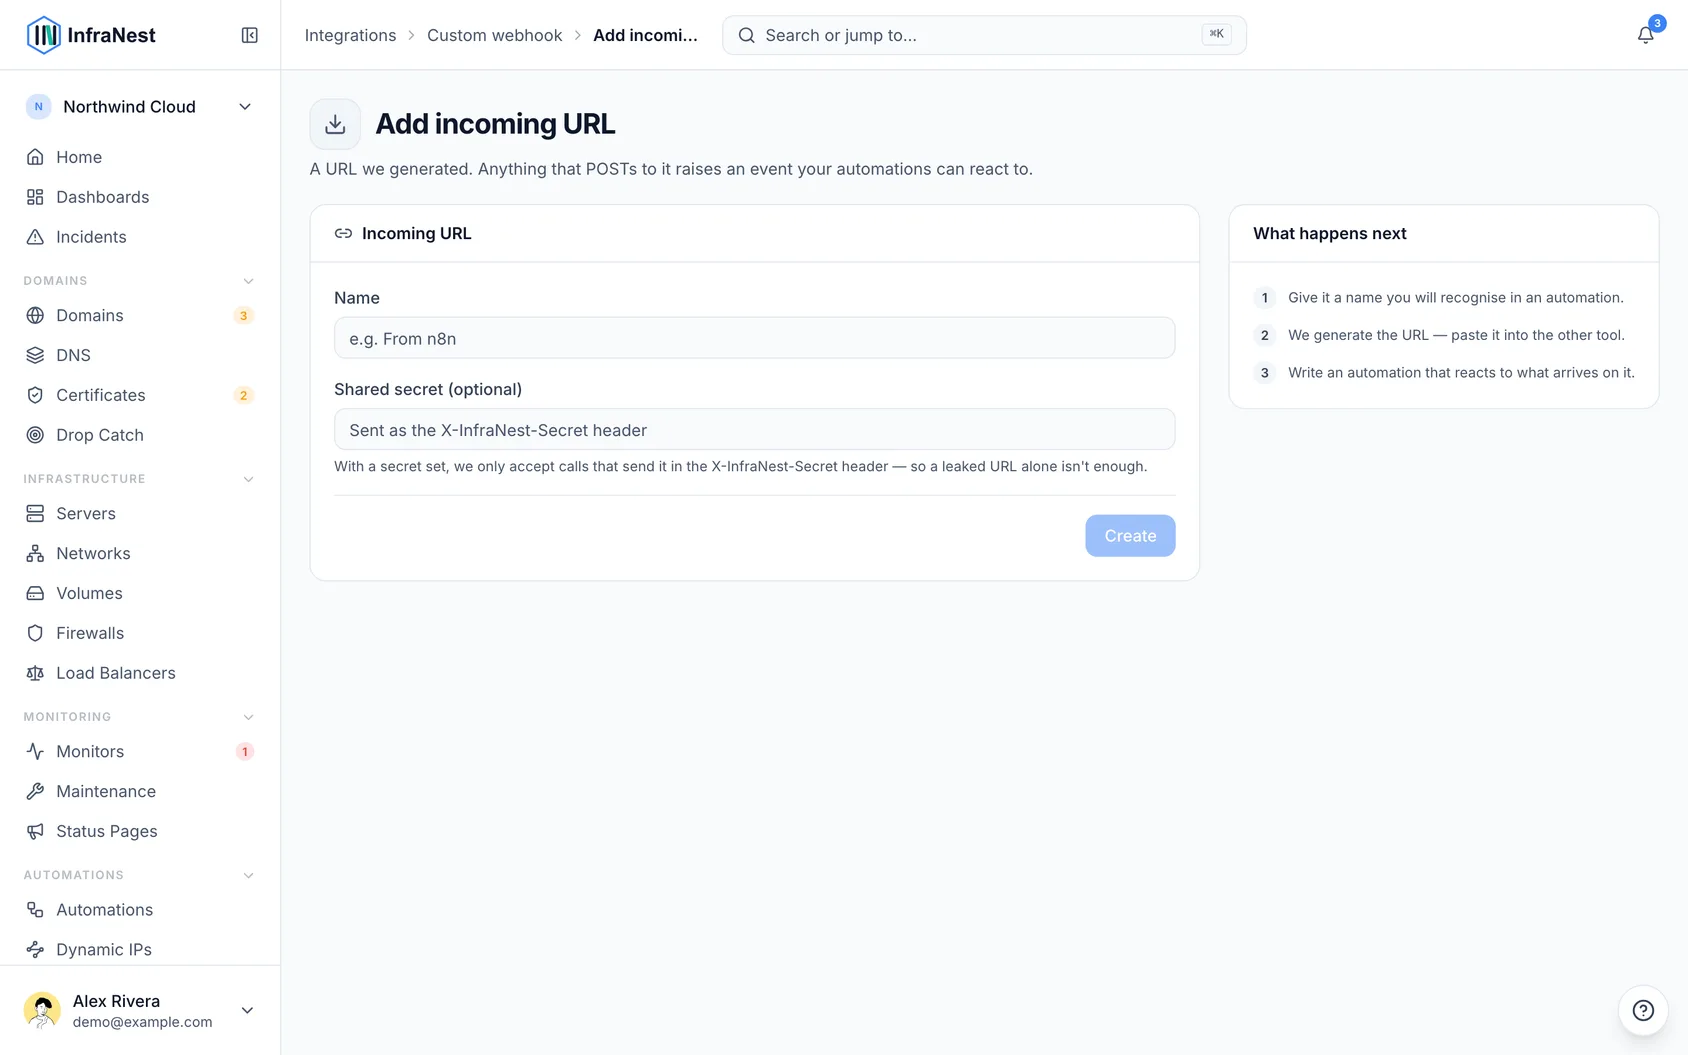
WarningThe URL is the credential. Anyone who has it can trigger your automations, so treat it like a password — set a Shared secret (optional) as a second lock, and use Regenerate URL if it leaks.
For full details on creating one and what the other tool gets back, see Connect a custom webhook.
#Set up an outgoing webhook Pro
An outgoing webhook works the other way: when something happens in InfraNest — a monitor goes down, a domain is about to expire, a watched domain becomes available — InfraNest sends the details to a URL you choose.
- Go to Integrations and open Custom webhook (or Zapier, Make, n8n or Power Automate, depending on which tool you use).
- Find the Where events go section.
- Select Add endpoint and paste in the URL the other tool gave you.
- Build or edit an automation to decide which events get sent to this endpoint.
Every delivery is signed and listed under Recent deliveries, so you can check what was sent and whether it arrived. See Connect a custom webhook for the full walkthrough.
#Troubleshooting
Still not sure which one you need? Ask which side starts the conversation:
- "When X happens in my other tool, do something in InfraNest" → use an incoming endpoint.
- "When X happens in InfraNest, tell my other tool" → use an outgoing webhook.
- "Both" → you need one of each; they work independently of each other.
TipIf calls aren't arriving the way you expect, check the endpoint's What has arrived list first — it shows exactly what was received or turned away, and why.
Was this article helpful?
Thanks for your feedback!
Thanks, this goes straight to the docs team.
Related articles
 AWSConnect Amazon Web Services (AWS)Connect AWS to manage your Route 53 DNS, Route 53 domains and ACM certificates from InfraNest.CalendarProSubscribe with a calendar feed (iCal)Subscribe to a private link and your renewals, certificate expiries and maintenance windows appear in any calendar app — Apple Calendar, Outlook, Google…CalendarAbout calendar syncPut your renewals, expiries and maintenance windows in the calendar you already use, so a domain never lapses because nobody was looking at InfraNest that week.