

Create a DNS zone in InfraNest and let the wizard handle the cross-provider work for you — including pointing your domain at the new provider. This article is for anyone who needs to set up DNS for a domain without wrestling with multiple provider dashboards.
Overview
- Creates a new zone at the DNS provider you choose
- Can fill the zone automatically by scanning live DNS, copying from another zone, applying a template, or starting blank
- Can update your domain's nameservers at the registrar in the same flow
- Keeps watching the zone for drift once it's created
TipRegistering the domain through InfraNest right now? You don't need this wizard. Choose Use one of your DNS providers on the add-domain page and the zone is created and connected for you as soon as the registration is confirmed — see Register a new domain.
Create a zone
- Go to DNS and select create a zone.
- Enter the domain. InfraNest matches it to a domain in your portfolio and detects which DNS provider currently runs it, from the domain's live nameservers.
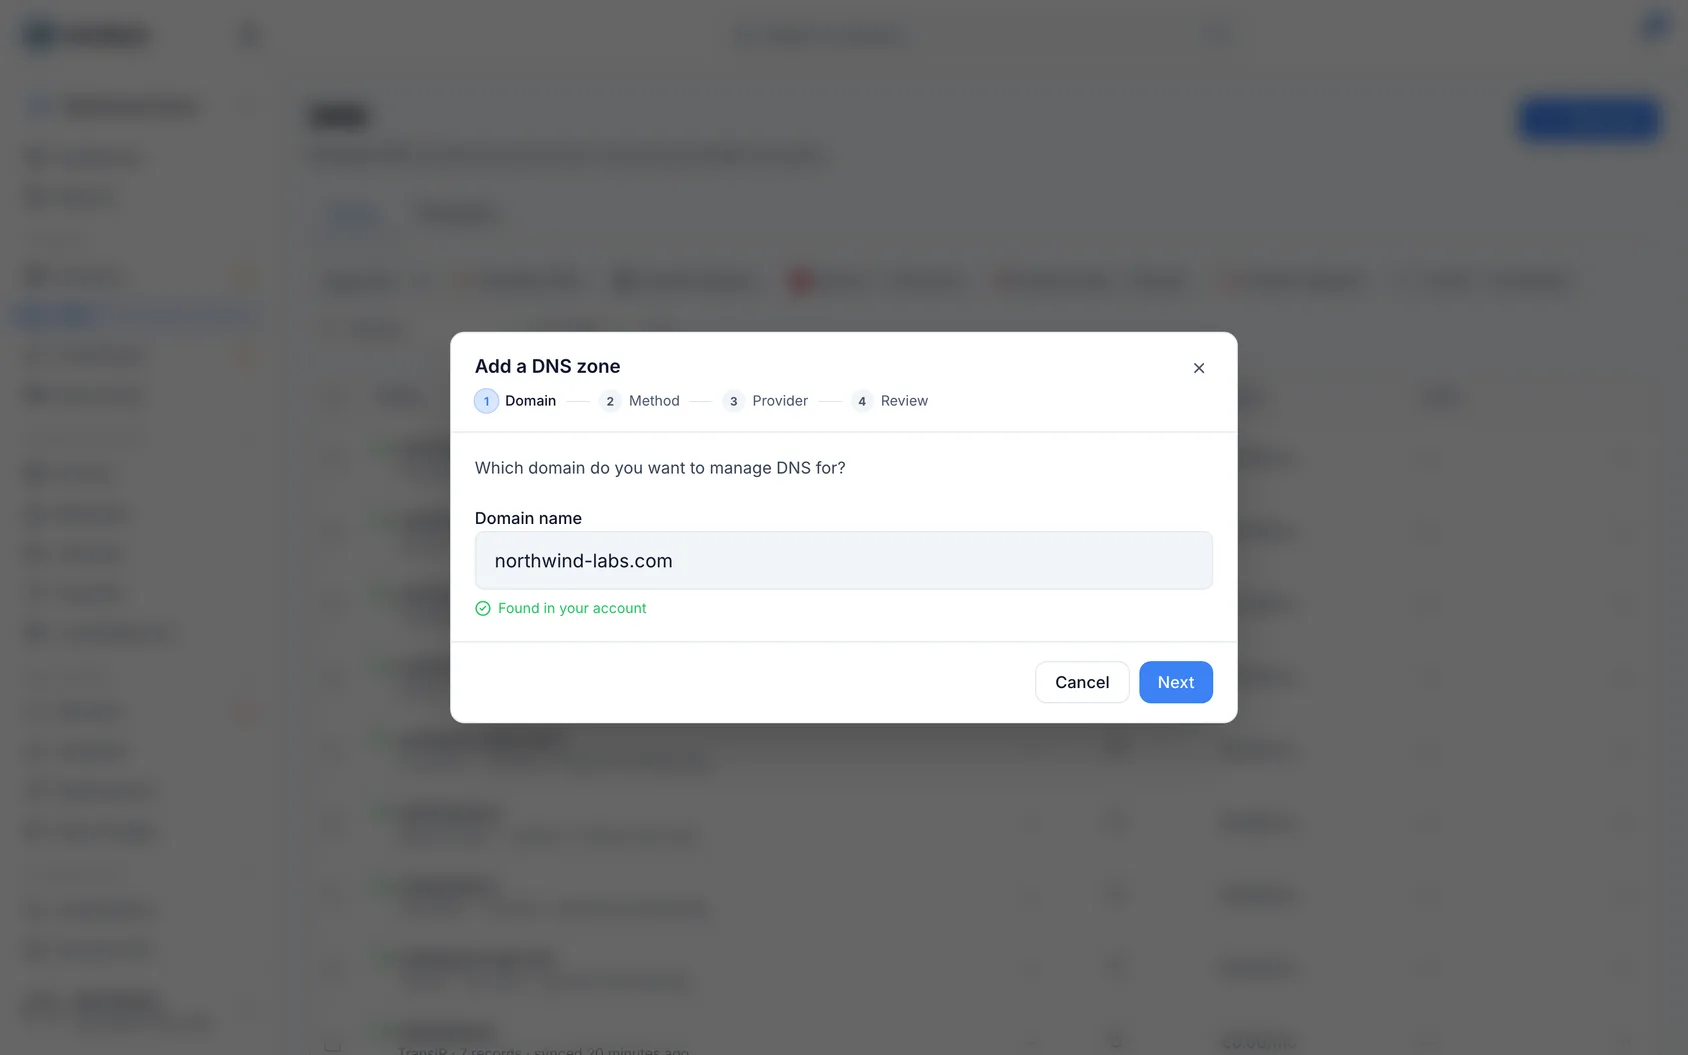
Choose how to fill the zone:
- Scan — read the domain's live DNS and import the records it finds, so the new zone matches what's working now.
- Copy from — copy the records from an existing zone at a provider you've connected.
- Template — start from a DNS template (see DNS templates).
- Manual — start blank.
Create it at the provider. InfraNest creates the zone at your chosen DNS provider and picks up its nameservers.
Not every provider can host a new zone. Some — GoDaddy, TransIP, Namecheap, Dynadot, Porkbun — only run DNS for domains registered with them, so if your domain is registered there the zone already exists and there is nothing to create. OVHcloud can host any domain's DNS, but the zone has to be ordered in its own control panel first. Those accounts are shown greyed out in this step, with a note saying why. To bring one of their zones in, go to Settings → Integrations, open the account and choose Discover zones.
Point your domain at it. If the domain is at a connected registrar, the wizard offers to update its nameservers to the new provider in one step — no second dashboard needed.
Once created, drift detection keeps an eye on the zone from then on.
If the domain still points somewhere else
Sometimes the zone exists here and the domain is still pointed at your registrar's own nameservers — the step above was skipped, the registrar refused the change at the time, or somebody moved it back later. The records you edit here are then not what visitors and mail servers are being told.
The domain page says so. Open the domain, look at Where it points, and you will see a line naming the provider your zone is at, with Point it at the zone beside it. One press writes the right nameservers at your registrar — you never have to look them up.
Nameservers take a while to spread across the internet, so give it up to a few hours before judging the result. If the button is greyed out, your registrar connection cannot change nameservers; the tooltip says which of the reasons applies.
If some records could not be added
Scan and copy from write the records into the zone at your DNS provider, and a provider can refuse — a rate limit on a large zone, a key that has expired, a record type it does not accept. When that happens InfraNest stops rather than pushing the rest, and tells you how many records were added, how many were not, and what the provider said.
Records it could not add are not kept. A record that existed only in InfraNest would show as live here while nothing had changed at your provider — and it would disappear on the next sync anyway. Sort out what the message describes, then run the scan or copy again: records already there are skipped, so nothing is duplicated.
If your zone says the records came from a public lookup
A zone that isn't connected to a provider account can't be read directly, so InfraNest works out what's in it by asking public DNS servers about the apex and a list of common subdomain names. That gets you something to look at, but it is a guess, and the zone page says so at the top.
Three things it cannot see:
- Records behind a proxy. If a record is proxied — Cloudflare's orange cloud, for example — public DNS answers with the proxy's own addresses instead of what you set. So a name pointing at a Pages or Workers site shows up as an IP address that changes on its own, and never settles.
- Anything with an unusual name. Only common names are tried, so
status,docs,shopand the like are missed entirely. - Whether a name really exists. A catch-all (wildcard) record answers for every name asked about, so names that were never set up can appear as though they were.
Connect this zone on that message fixes all of it at once. InfraNest looks through the provider accounts you've connected, finds the one holding this zone, and reads the real record list from it — adding what was missing and removing what was never really there.
NoteIf nothing happens, the message tells you which of two things is true: no DNS provider account is connected yet, or the accounts you have don't hold a zone by this name. Either way the fix is in Settings → Integrations — connect the provider that hosts the domain, then press it again.
Was this article helpful?