

Let your team sign in to InfraNest using the accounts your company already manages in Okta, Microsoft Entra ID, Google Workspace or another OpenID Connect provider.
Overview
- People sign in with the work accounts your IT team already controls.
- Access stays centralized — someone removed at your provider can no longer sign in to InfraNest.
- This is available on Enterprise plans. If you just want people to sign in with Google, GitHub or Microsoft without your own provider, see Single sign-on and sign-in connections instead.
Before you start
- In your identity provider, create an application for InfraNest. Okta calls this an OIDC web application; Entra ID calls it an app registration.
- Note down the client ID and client secret from that application.
- Keep the application's page open — you'll come back to it once, to add a redirect URL.
Connect it
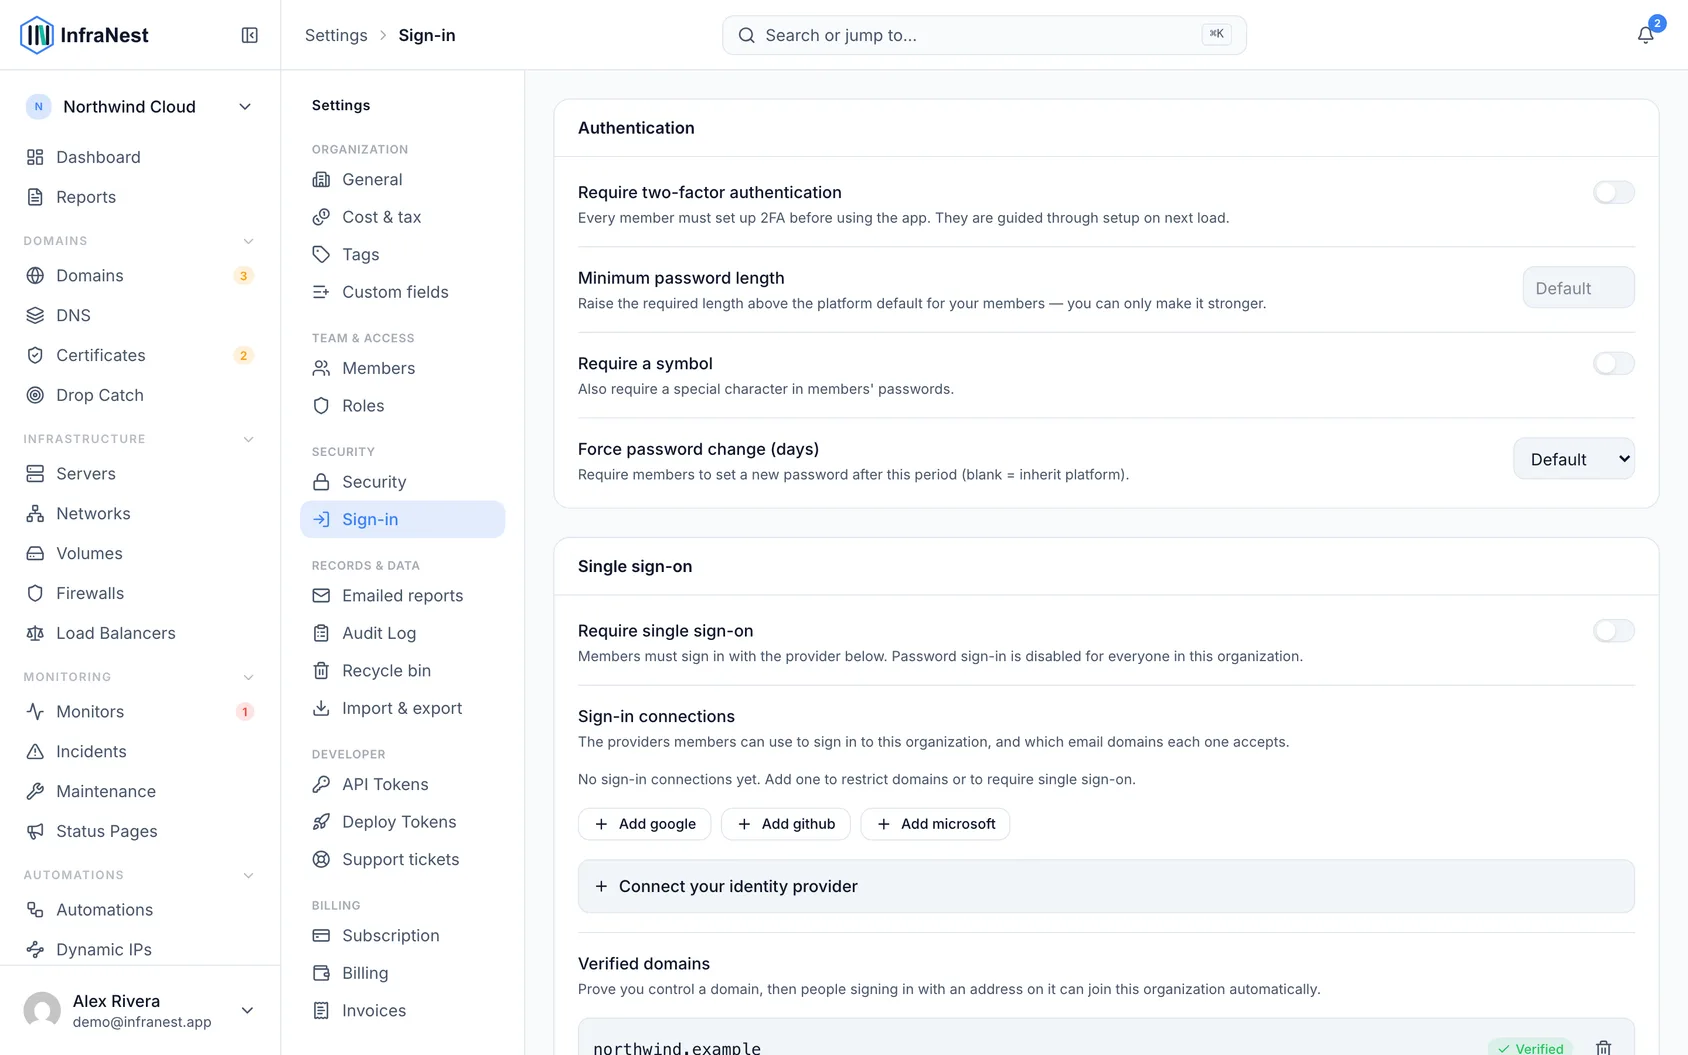
- Go to Settings → Sign-in.
- Choose Connect your identity provider.
- Pick your provider and fill in the one field it asks for:
- Okta — your Okta domain, for example
acme.okta.com. This is the address you use to sign in to Okta; copy it from your browser's address bar. - Microsoft Entra ID — your tenant ID, or any domain that belongs to your tenant. Both are on the Entra overview page.
- Google Workspace — nothing to fill in.
- Another provider — the discovery URL it publishes, usually ending in
/.well-known/openid-configuration.
- Okta — your Okta domain, for example
- Paste in the client ID and client secret, then choose Connect.
InfraNest reads everything else — the sign-in address, the token address and your provider's signing keys — directly from the provider. If it can't reach the provider, the connection isn't saved, and the error explains what it tried.
Finish at your provider
The new connection is switched Off on purpose, because one step remains:
- Copy the Redirect URL shown on the connection.
- Add it to the application you created at your provider, as a sign-in redirect URI.
- Choose Check. It re-checks your provider and reports what came back.
- Turn the connection On.
How your team signs in
- Go to the normal sign-in page and type your work email address.
- If its domain has been verified, a Continue with … button appears, named after your connection.
- Choose it to be taken to your provider to sign in.
NoteYou don't need to send anyone a special link, though the connection does have one for anyone who prefers a bookmark. Verify your email domain if you want the Continue with … button to appear automatically — without a verified domain the connection still works, it just can't be found from an email address alone.
Decide who gets in
Two separate settings live on the connection:
- Allowed email domains — narrows which addresses may use it. Subdomains aren't included automatically:
acme.comdoes not also allowmail.acme.com. - When somebody new signs in — decides what a successful sign-in grants:
- Do nothing — they still need an invitation. This is the safe default.
- Ask an admin — their sign-in raises a join request for an administrator to approve.
- Add them straight away — they get a seat immediately, on the role you choose.
The third option only exists for your own identity provider, not for Google or GitHub sign-in — because only your provider knows who's allowed to use InfraNest. Someone your IT hasn't assigned to the app in Okta or Entra ID can't get past the sign-in screen at all. Google, by contrast, will authenticate every address at your domain, including contractors, shared mailboxes, and people who've left but whose account still exists.
WarningThe role new members land on can never be an owner role, or any role that can change or delete things. Raise individual people's access afterwards, by hand.
Joining is always additive — somebody who already has their own InfraNest organization keeps it, and simply gains a membership in yours.
Give people roles from your own groups
If your provider already separates who does what — an infra-admins group and an infra-readonly group, say — InfraNest can use that instead of you setting a role per person by hand.
- Under Credentials and claim names, fill in Groups claim with the field your provider sends groups in. Okta usually sends
groups; Entra ID sendsrolesfor app roles. Leave it empty and groups aren't used at all. - Add a row per group: the group's name exactly as your provider writes it, and the role it should get here.
What to expect afterwards:
- Roles follow your provider. Move somebody to another group and their role here changes the next time they sign in.
- Your own changes stick. Change somebody's role here by hand, and it stays as you set it — their groups stop deciding it from then on.
- An unmapped group changes nothing. Somebody whose groups match no row keeps the role they already have, so a mistyped claim name can't demote your whole team.
- Roles that can change or delete things can't be mapped here, the same as the default role — raise individual people yourself.
Rotating the client secret
- Go to Credentials and claim names.
- Enter the new secret.
- Choose Replace.
The stored secret is never shown again, so leaving the field empty always keeps the current one.
Claim names
Leave Claim names empty unless your provider uses non-standard names for a person's email or name. The defaults are correct for Okta, Entra ID and Google Workspace.
Troubleshooting
- Choose Check first — it names the problem in most cases, such as an unreachable provider or a provider now announcing a different issuer than the one this connection was set up with.
- "Your identity provider rejected this connection's credentials" means the client secret expired or was rotated at your provider. Replace it as described above.
- "
does not use means the person belongs to another organization that requires its provider. Signing in through the right one works.for single sign-on" - A provider that moved to a different tenant needs a new connection — the issuer is fixed when the connection is created, and every sign-in is checked against it. This is deliberate: it's what stops a provider being quietly swapped for another one.
- Your administrators can see every failed attempt, with the reason, in Settings → Audit Log.
Was this article helpful?