Connect your DNS provider
Pick where your DNS is hosted. You only see the steps for that provider, then the part in InfraNest.
1Pick your provider
Not listed? See all integration guides
2At Amazon AWS
A role means InfraNest never stores your secrets, and you can revoke access at any time by deleting the role.
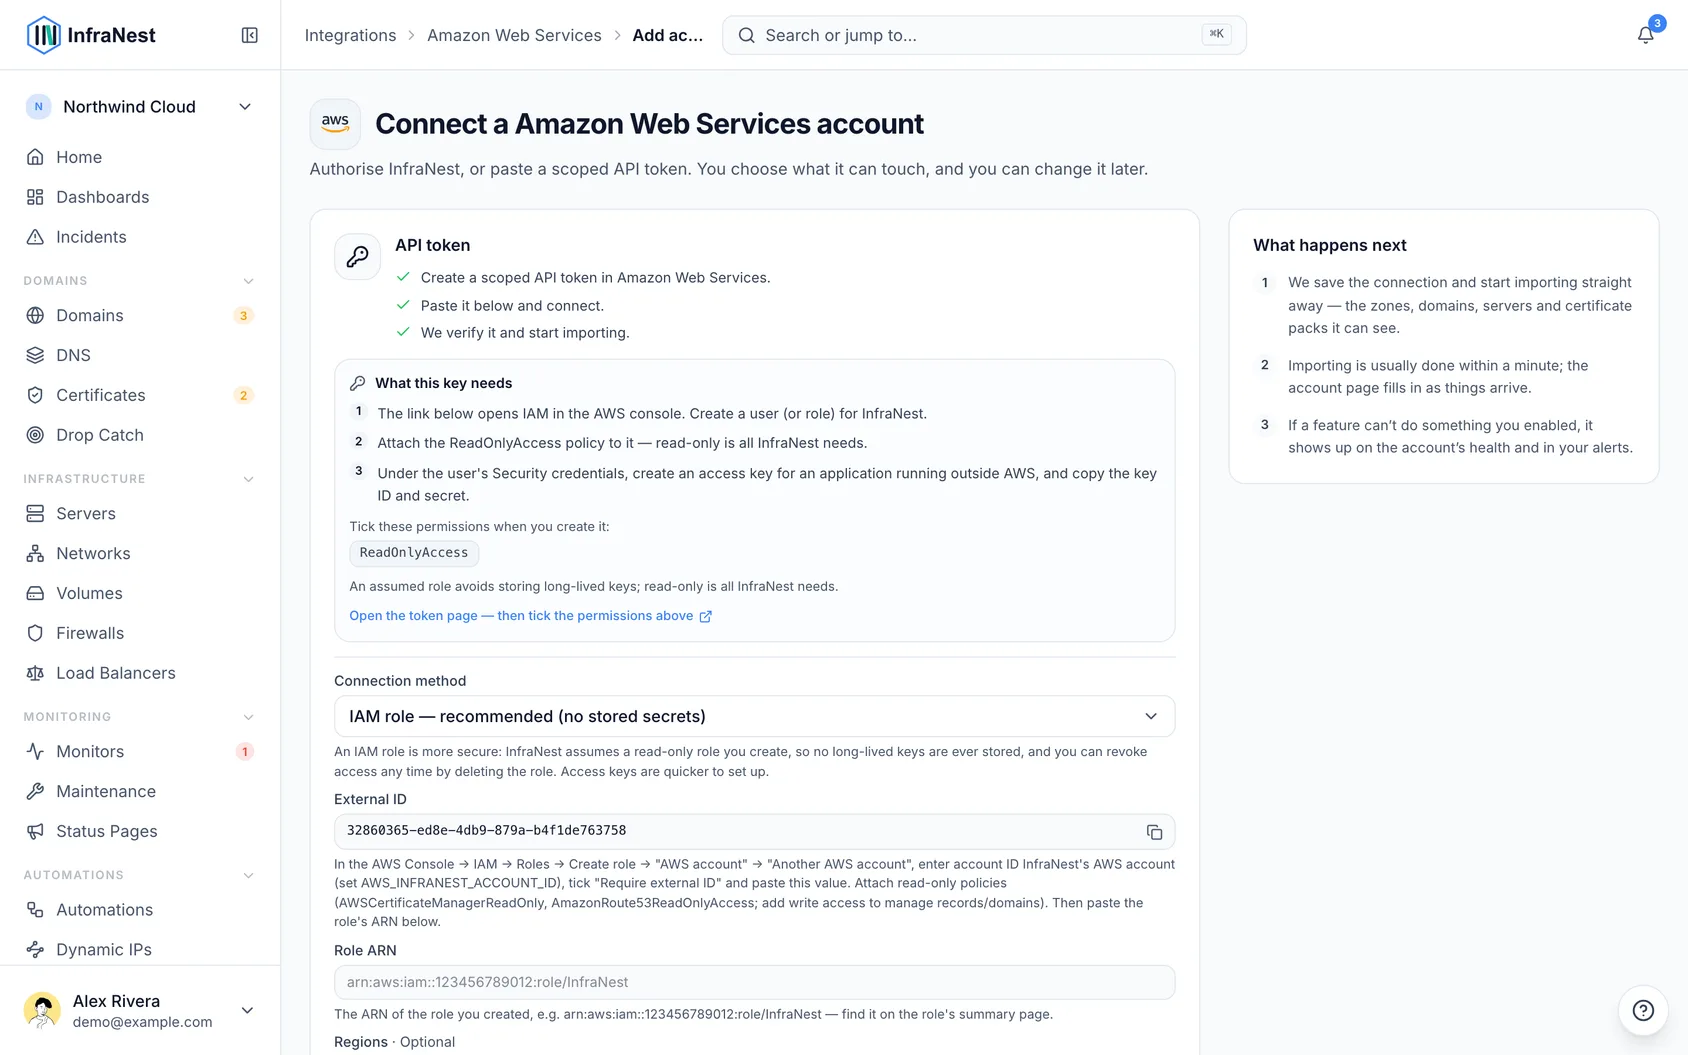
- In InfraNest, open Integrations → AWS, select Connect, and choose IAM role under Connection method. The form will show InfraNest's AWS account ID and a generated External ID — make a note of both, you'll need them.
- In the AWS IAM console, go to Roles → Create role, choose AWS account → Another AWS account, enter InfraNest's account ID, tick Require external ID, and paste in the External ID.
- Attach a policy with the permissions listed below.
- Name the role (for example
InfraNest), create it, then copy its ARN from the role's summary page.
3In InfraNest
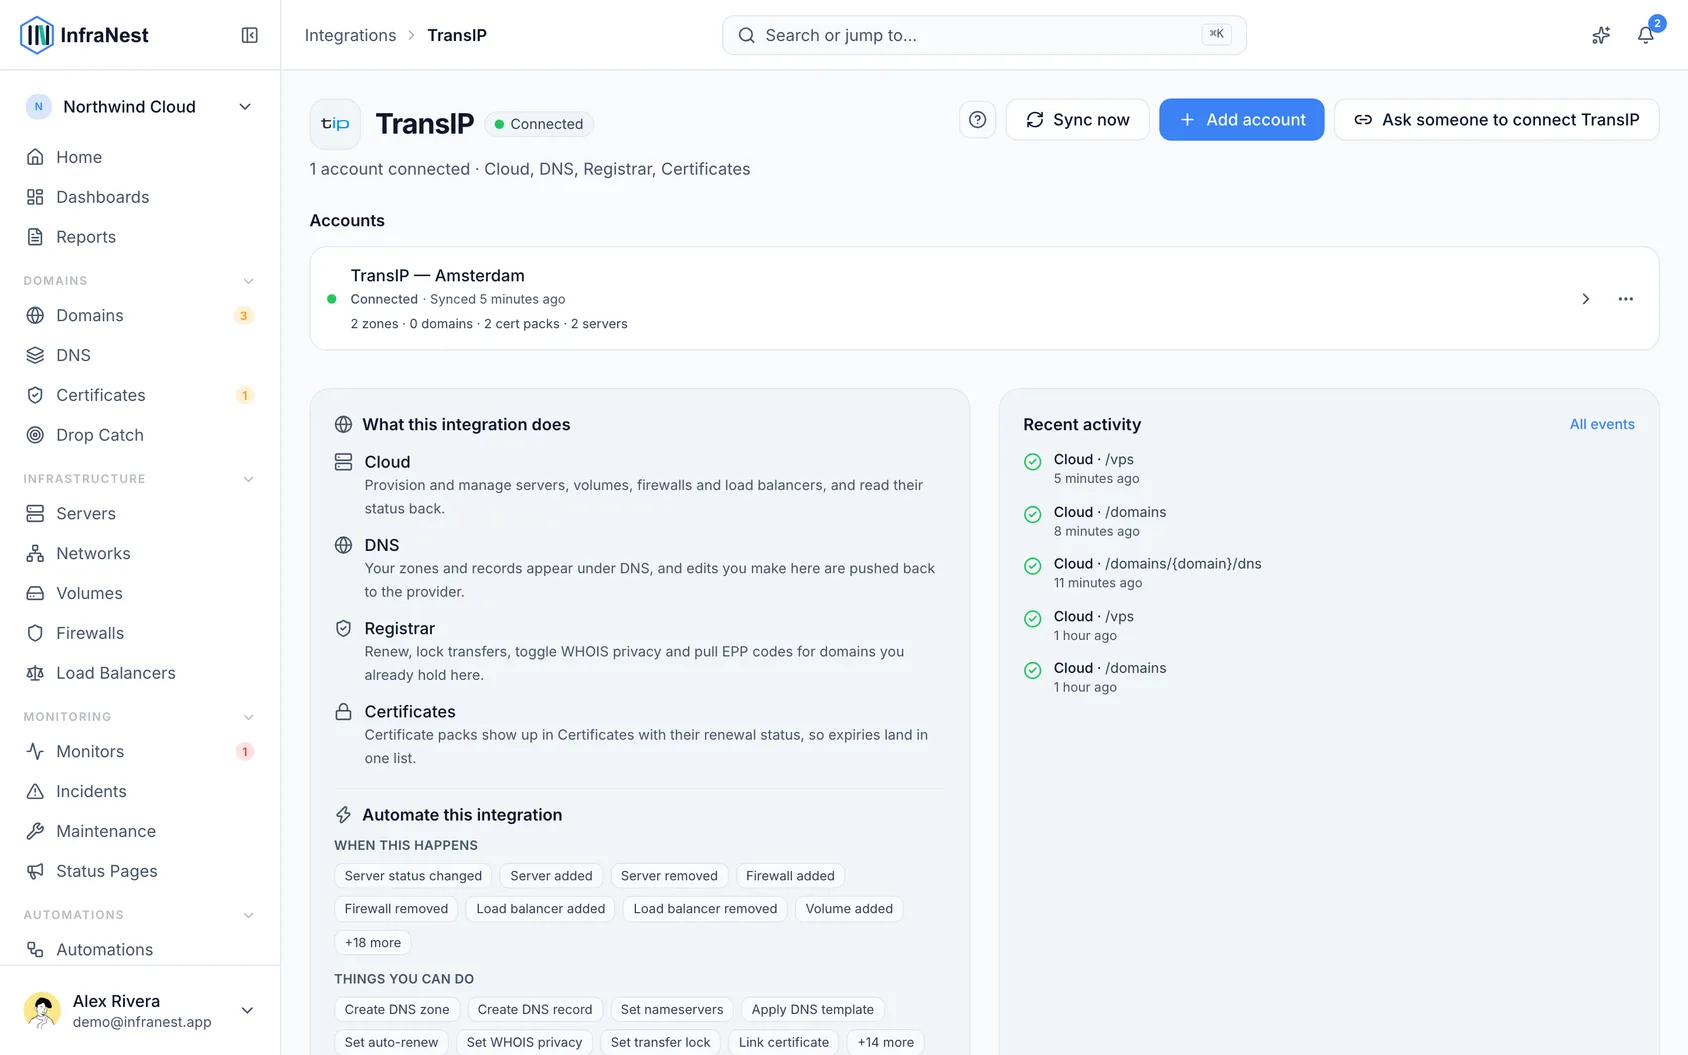
- Go to Integrations, open AWS and select Connect.
- Give the connection an Account label (optional). Leave it blank and it takes the provider's name — a second connection to the same provider becomes "… (1)", so they stay tellable apart.
- Choose which features to use it for: DNS, Registrar and Certificates.
- Under Connection method, choose IAM role and paste the Role ARN, or choose Access keys and paste the Access Key ID and Secret Access Key.
- Pick the Regions your ACM certificates are in. Leave it empty and only
us-east-1is checked. Route 53 is global, so DNS and domains don't depend on this. - Select Connect.
NoteReading your AWS account is enough to see your lists, but every change you make from InfraNest — adding a record, renewing a domain, and so on — needs write permission too.
2At Cloudflare
The quickest way is to select Open the token page — permissions pre-selected on InfraNest's Cloudflare connect form. This opens Cloudflare's token editor with the permissions already chosen — if you use this link, skip ahead to step 5.
To create the token by hand instead:
Sign in to the Cloudflare dashboard.
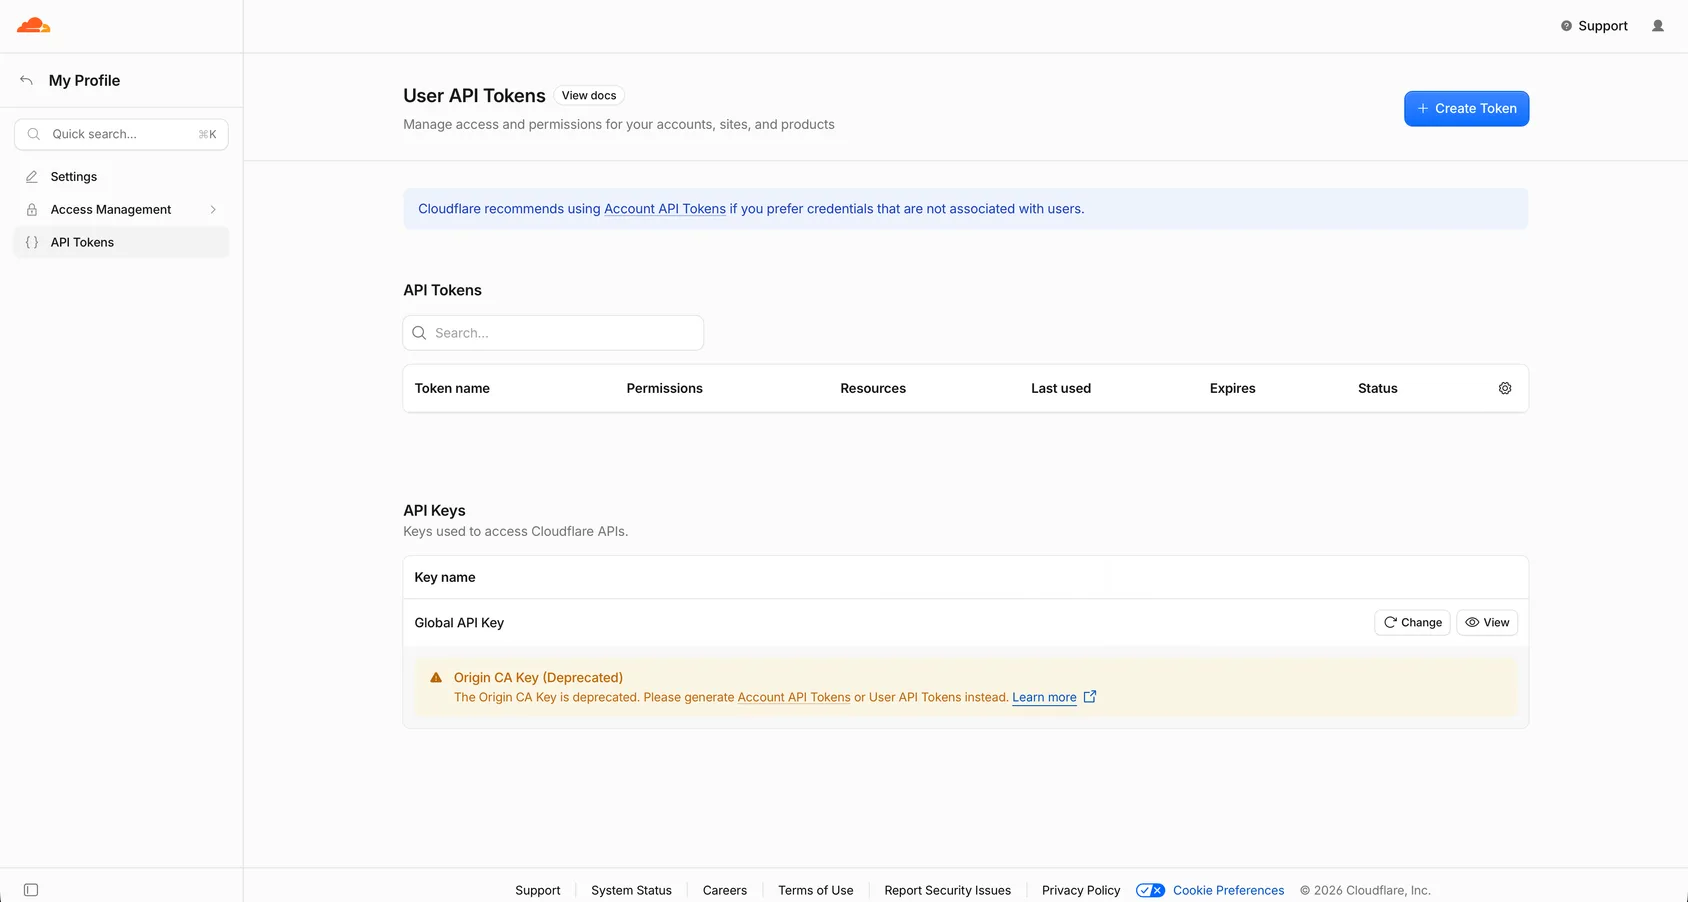
Go to My Profile → API Tokens.
Select Create Token, then Create Custom Token.
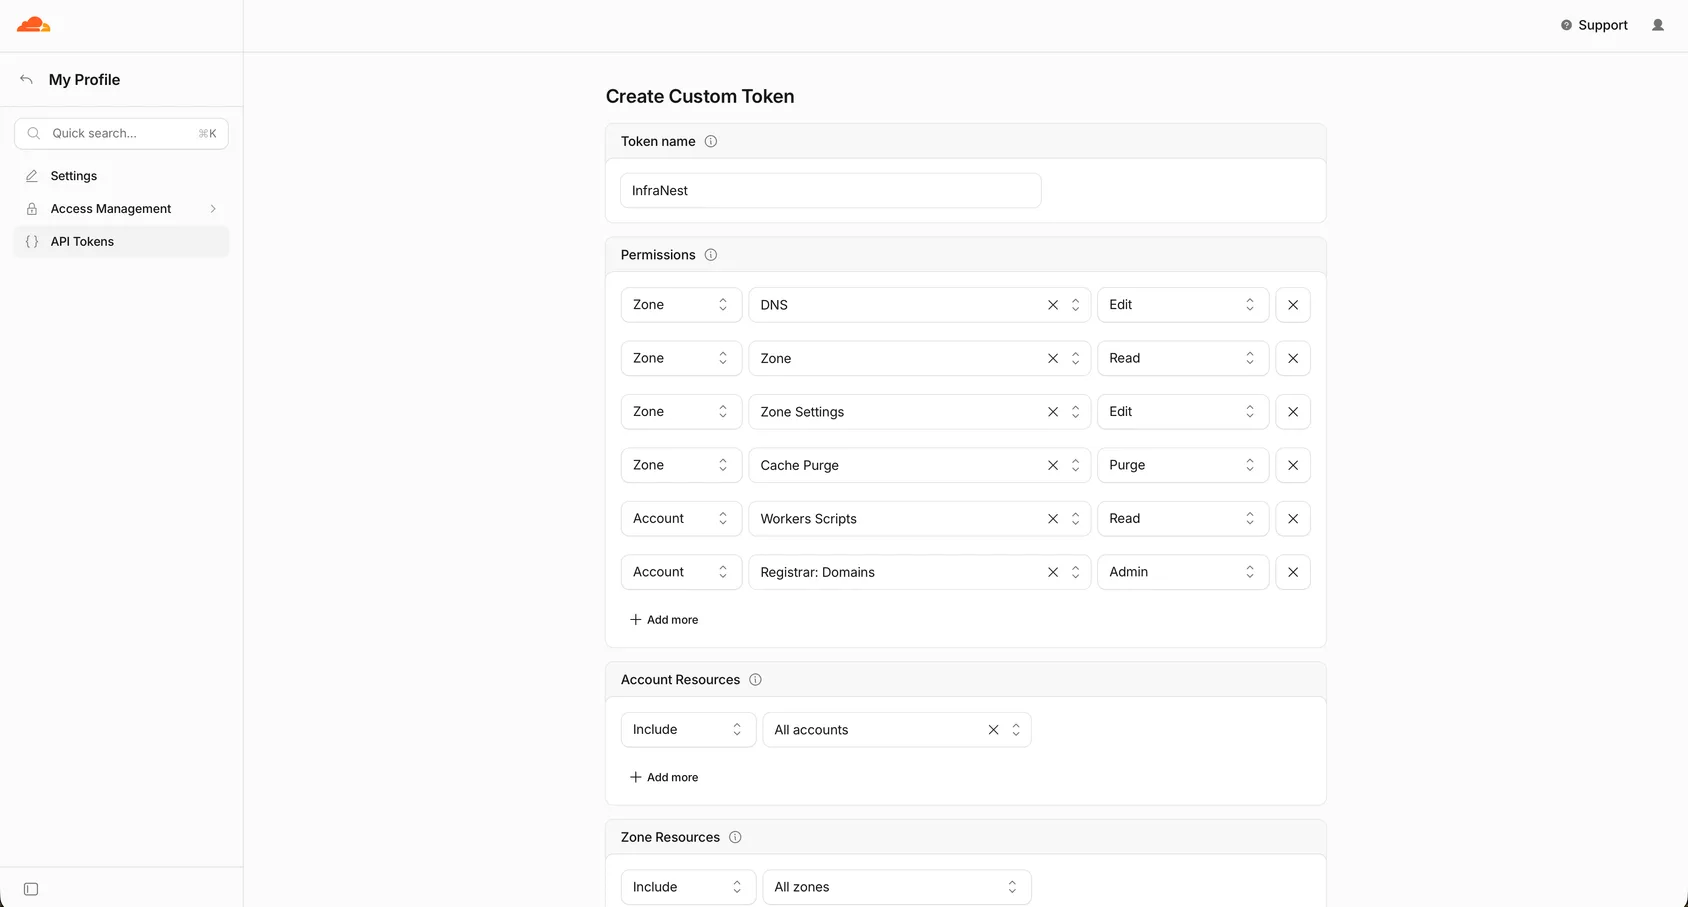
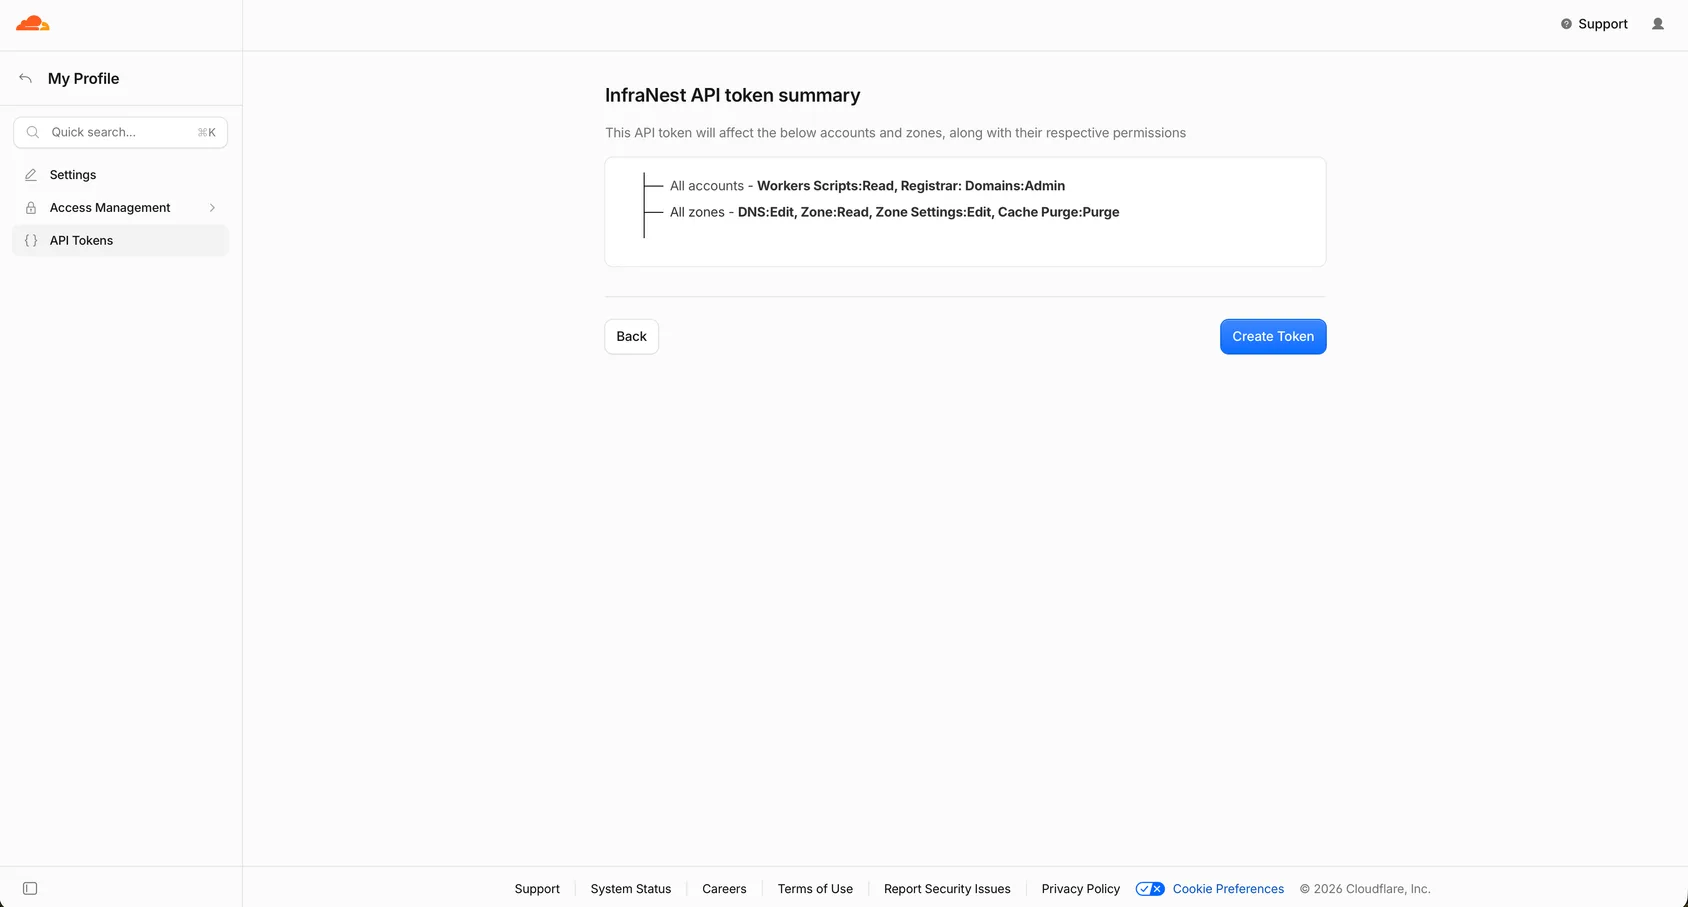
Give the token these permissions:
- Zone → Zone → Read and Zone → DNS → Edit — always needed.
- Zone → SSL and Certificates → Read — needed for the Certificates feature.
- Account → Registrar: Domains → Admin — needed for the Registrar feature, if you have domains registered at Cloudflare.
- Zone → Zone Settings → Edit and Zone → Cache Purge → Purge — needed if you want automations to change Cloudflare settings (security level, development mode, Always Online) or clear your cache.
- Account → Workers Scripts → Read — needed if you use Cloudflare Workers and want the hostnames they serve listed on the zone page. The pre-filled link doesn't include this one, so add it yourself if you need it.
Under Zone Resources, choose All zones, or just the zones you want InfraNest to manage. Zones you leave out won't be imported.
Select Continue to summary, then Create Token.
Copy the token right away — Cloudflare only shows it once.
WarningCloudflare displays the token only one time. If you navigate away before copying it, you'll need to create a new one.
3In InfraNest
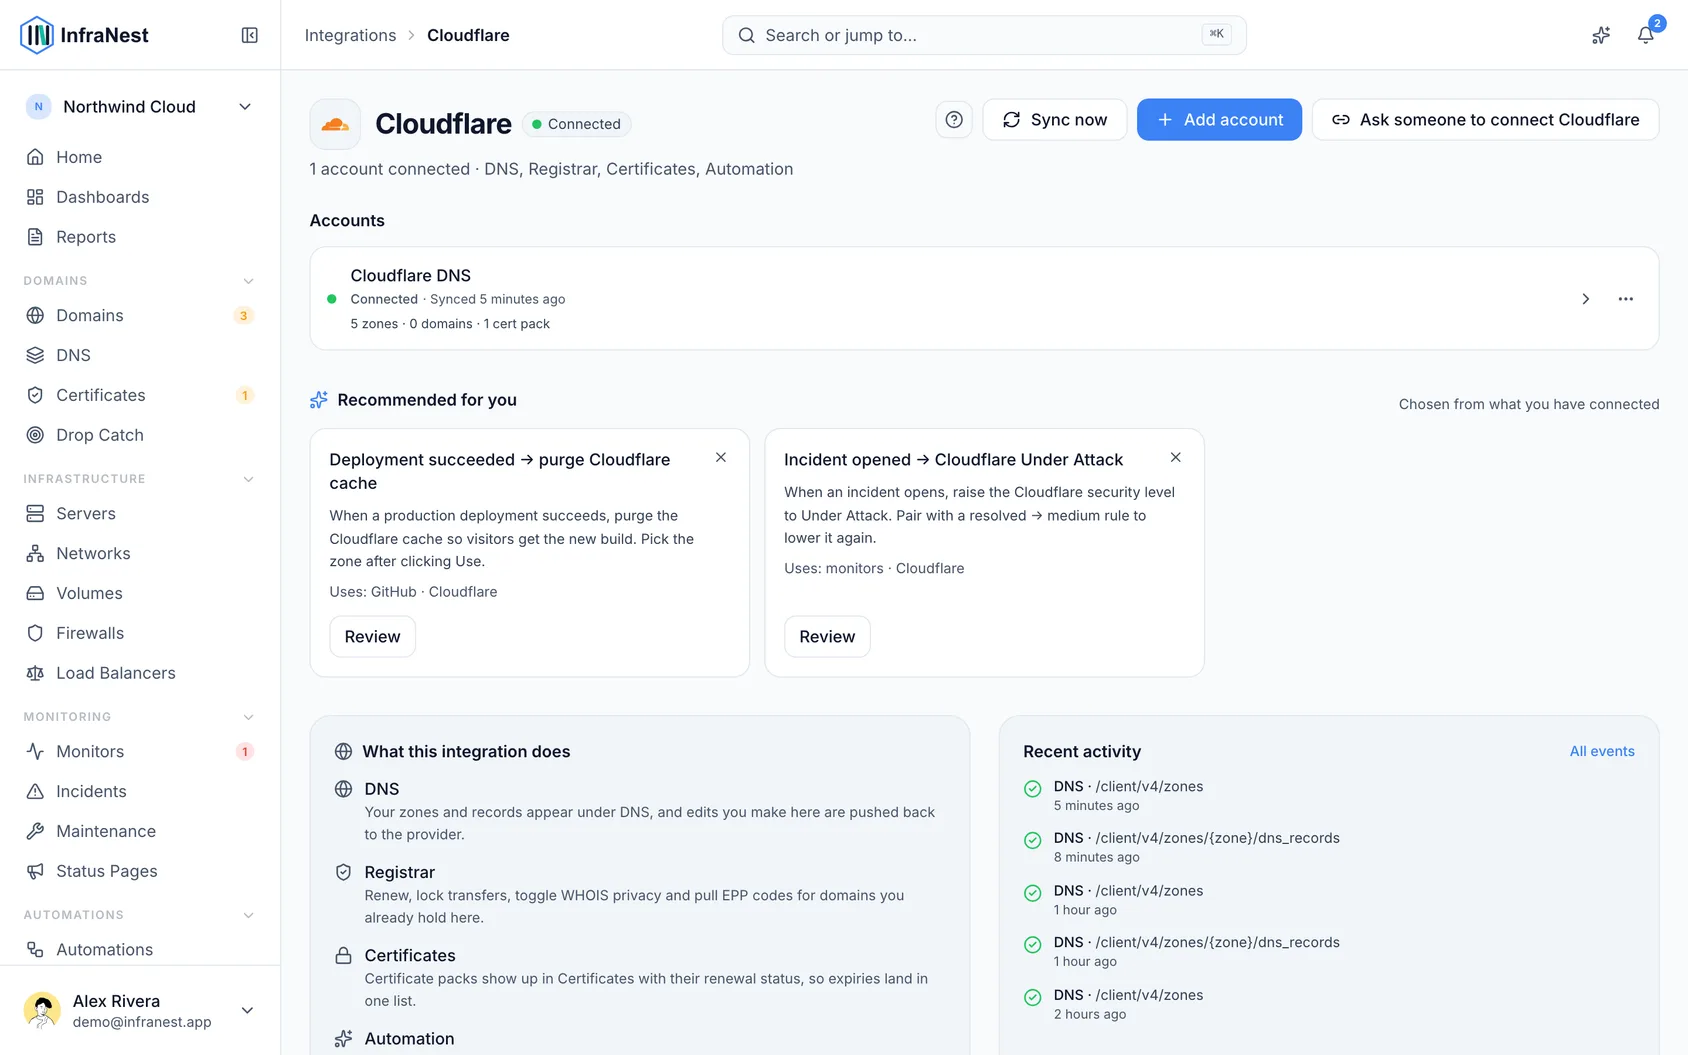
- Go to Integrations and open Cloudflare.
- Give the connection an Account label (optional). Leave it blank and it takes the provider's name — a second connection to the same provider becomes "… (1)", so they stay tellable apart.
- Choose which features to use it for: DNS, Registrar and Certificates.
- Select Connect with Cloudflare, or paste your API token (and your Account ID if needed).
- Leave Email me when this integration has problems ticked if you'd like email warnings.
- Select Connect.
2At DigitalOcean
- Sign in to DigitalOcean.
- Open the tokens page — the Open the token page link on the InfraNest connect screen takes you straight there, or use the left-hand menu: API (right at the bottom), then the Tokens tab.
- Select Generate New Token.
- Give it a name you'll recognise, such as InfraNest.
- Choose an expiry. See the note below before you pick one.
- Choose the scopes — Full Access is fine, or see the list below for a narrower token.
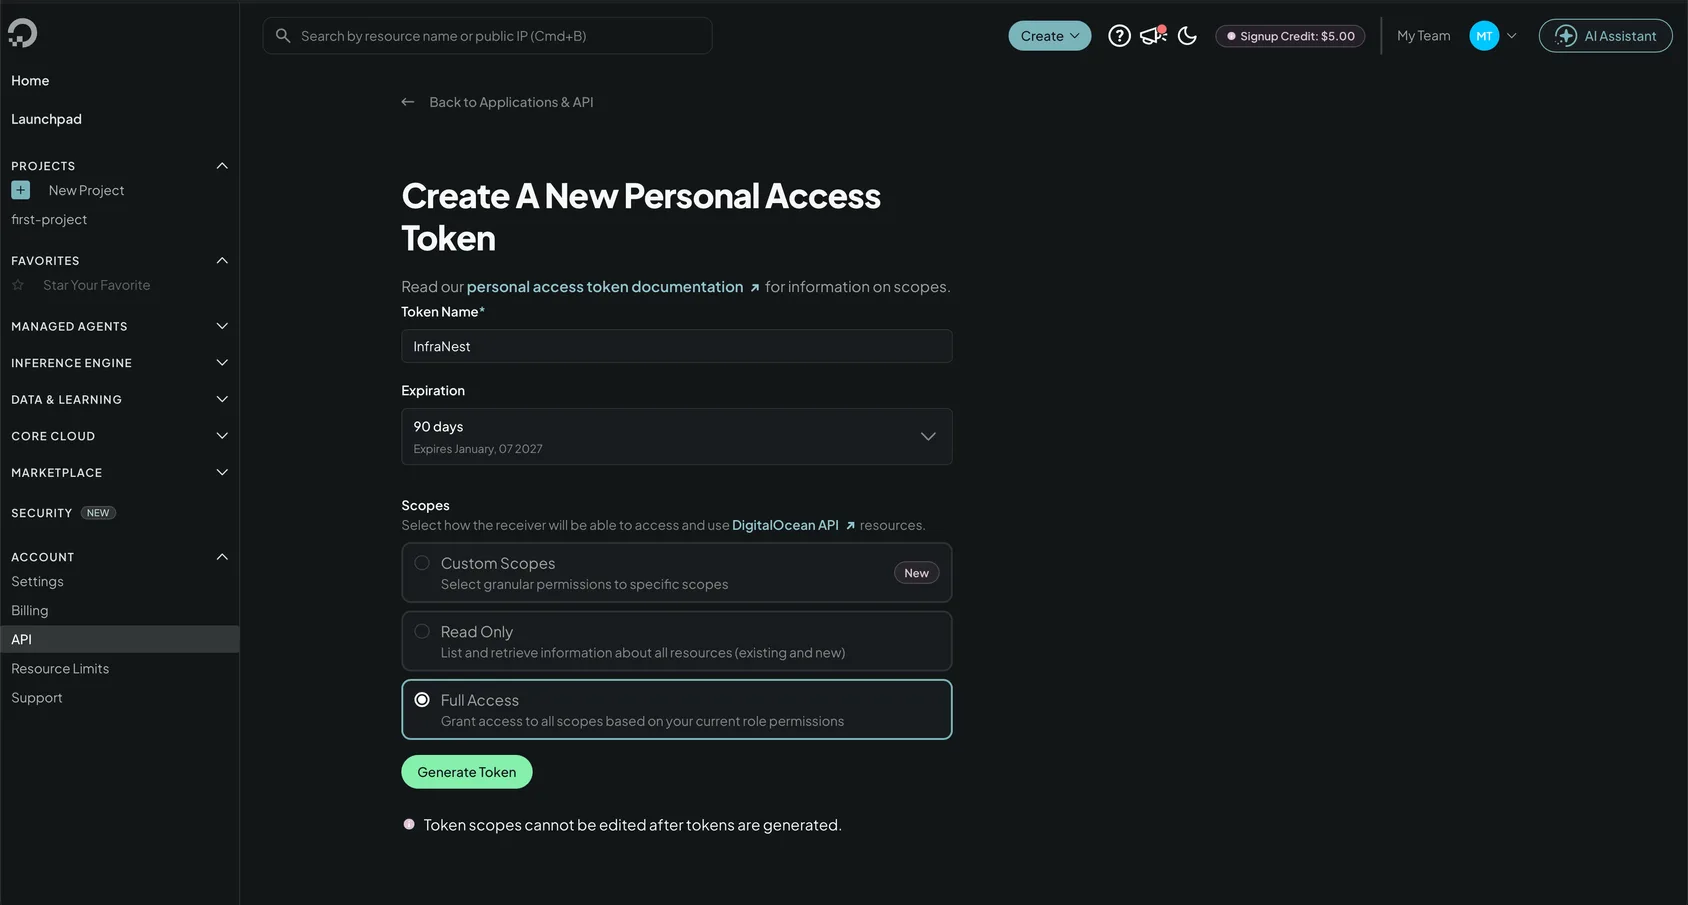
- Select Generate Token, then copy the value. It starts with
dop_v1_. - Paste it into InfraNest — see Connect DigitalOcean.
WarningThe token is shown once. If you navigate away without copying it, generate a new one rather than trying to find it again.
3In InfraNest
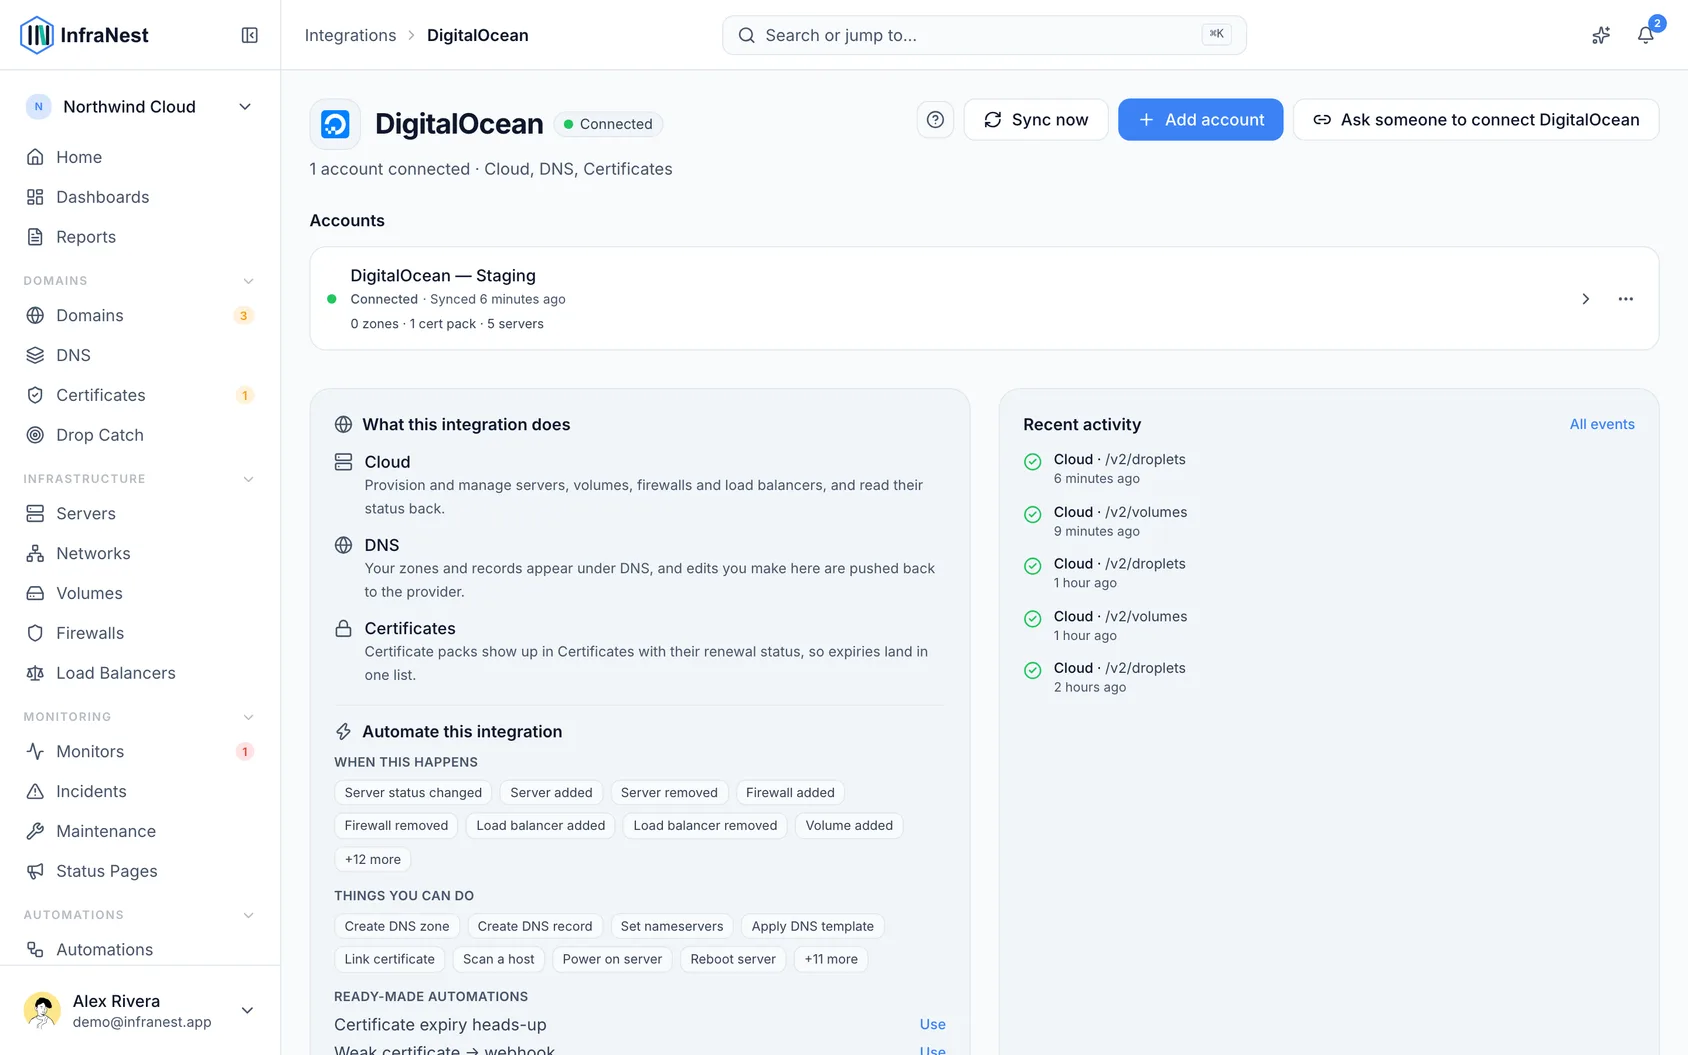
- Go to Integrations and open DigitalOcean.
- Give the connection an Account label (Optional — useful if you connect more than one account).
- Choose which features to use it for: Cloud, DNS and Certificates.
- Either select Connect with DigitalOcean and approve it in the window that opens, or paste your API token.
- Leave Email me when this integration has problems ticked if you'd like email warnings.
- Select Connect.
2At Dynadot
Sign in to Dynadot.
Go to Tools → API.
Create an API key and choose the v2 (REST) version. InfraNest uses v2.
Copy the API key and the API secret shown next to it.
Paste both into InfraNest — see Connect Dynadot.
WarningThe secret signs every request. Store it somewhere safe; if you lose it, create a new key pair rather than trying to recover it.
3In InfraNest
- Go to Integrations and open Dynadot.
- Give the connection an Account label so you can recognise it later. This is optional.
- Paste your API key and API secret.
- Optionally paste the Webhook key and Webhook secret so Dynadot can tell InfraNest about changes as they happen — see Create a Dynadot API key.
- Select Connect.
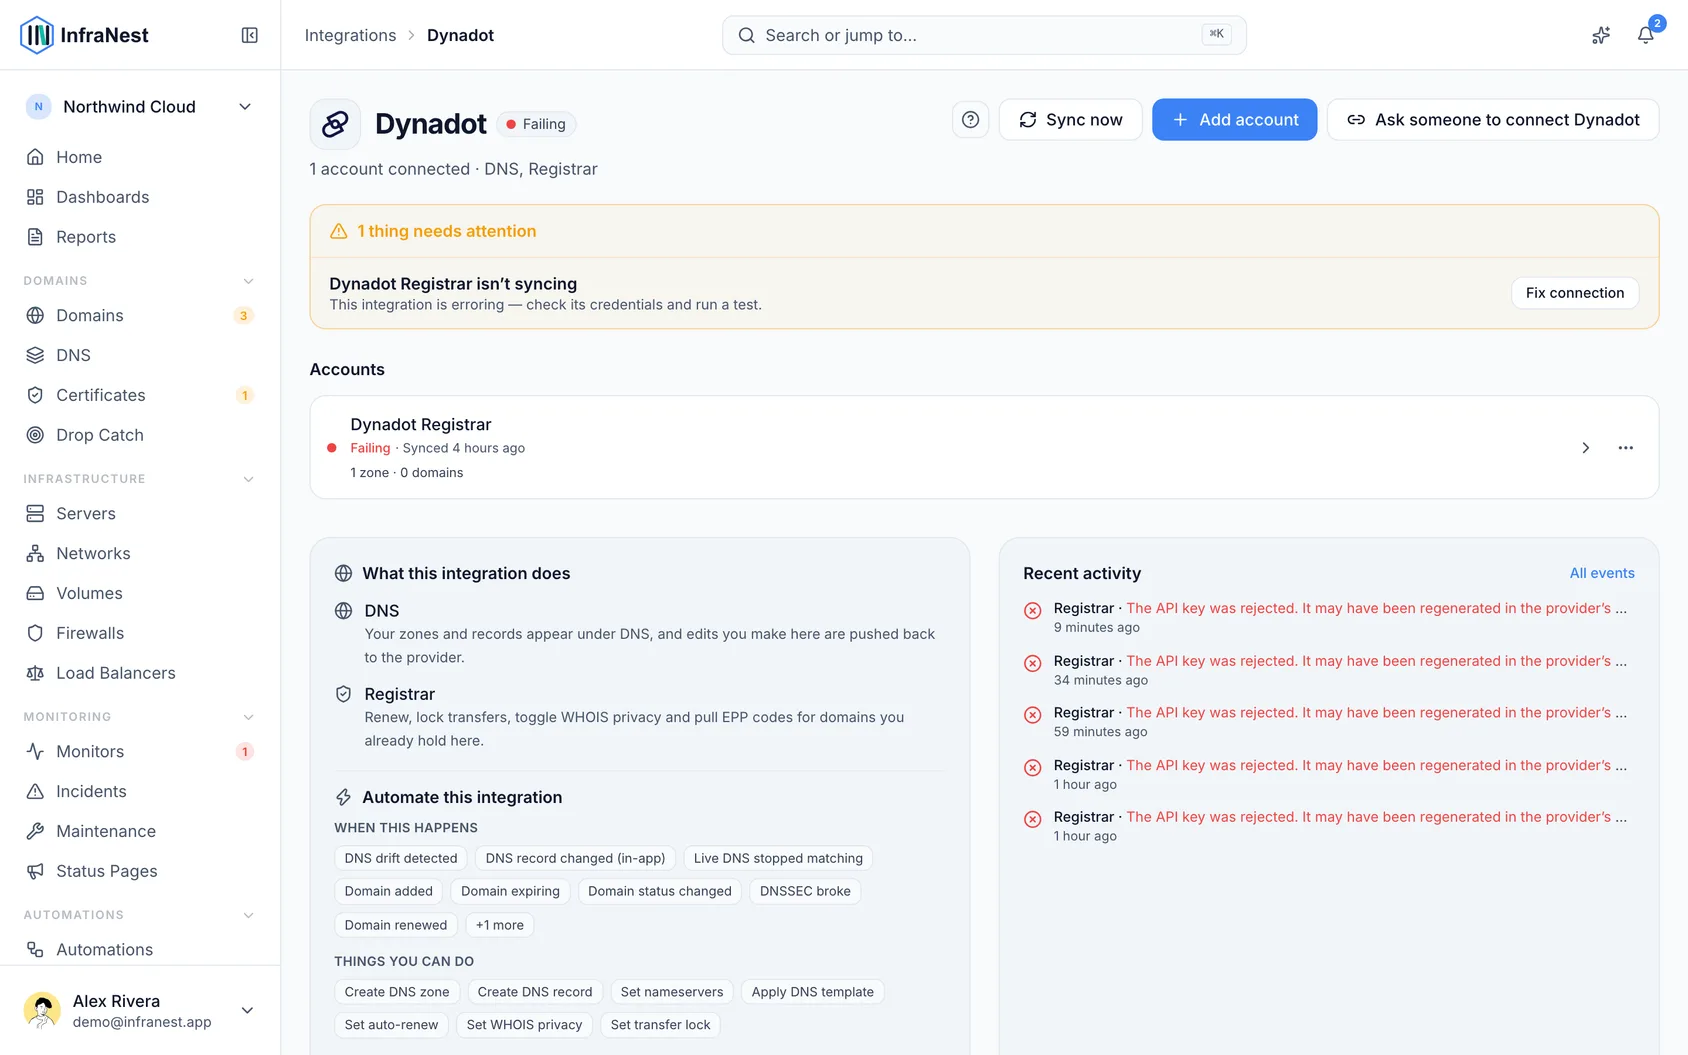
InfraNest checks the credentials and starts importing your domains.
2At GoDaddy
- Sign in at developer.godaddy.com/personal-access-token.
- Select + Generate Token.
- Give it a name you'll recognise later, such as "InfraNest".
- Choose an expiration. Pick the longest period you're comfortable with: when the token expires, InfraNest can no longer reach GoDaddy until you paste in a new one.
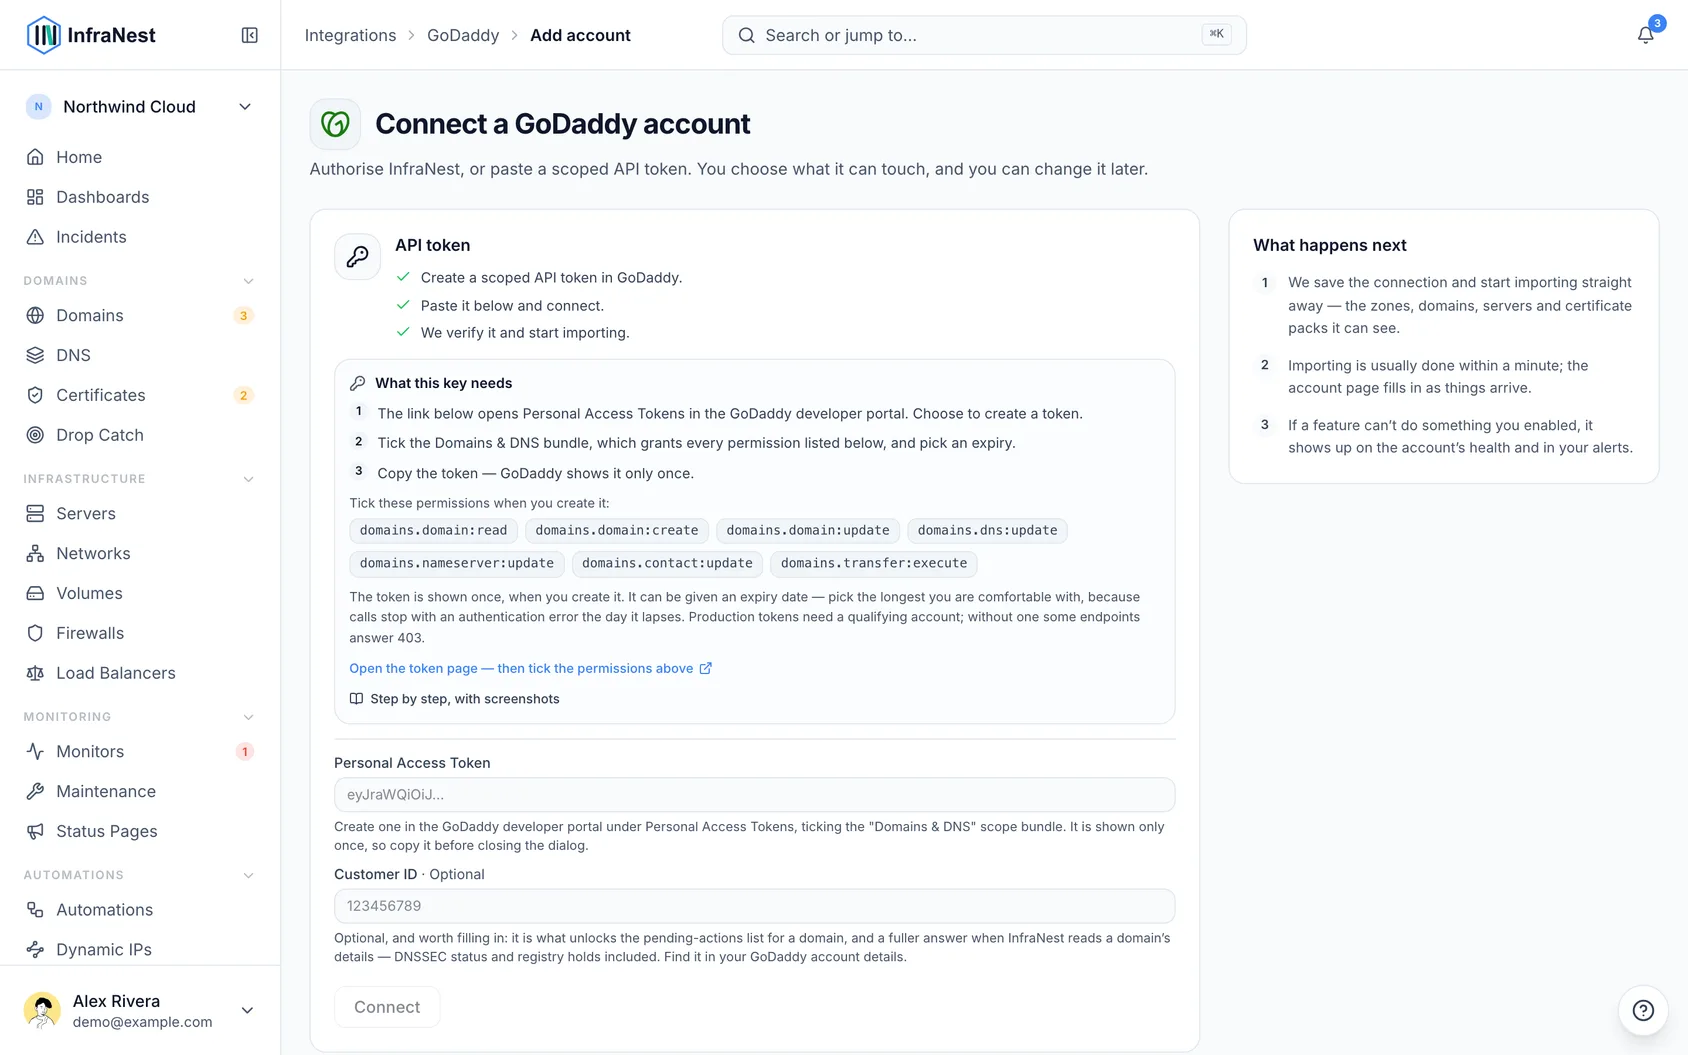
- Under scopes, tick the Domains & DNS bundle. That grants everything InfraNest needs in one go. If you'd rather grant less, expand the bundle and tick these instead: read domains, register domains, modify domain settings, update DNS records, replace nameservers, update contacts, and start transfers.
- Select Generate Token and copy it straight away — the token is shown only once.
WarningIf you lose the token, you can't look it up again — delete it in the portal and generate a new one.
3In InfraNest
- Go to Integrations and open GoDaddy.
- Give the connection an Account label (optional). Leave it blank and it takes the provider's name — a second connection to the same provider becomes "… (1)", so they stay tellable apart.
- Choose which features to use it for: DNS and Registrar.
- Paste your Personal Access Token.
- Optionally fill in your Customer ID, from your GoDaddy account details. It lets InfraNest show a domain's pending actions (and cancel one), its DNSSEC status and any registry holds.
- Leave Email me when this integration has problems ticked if you'd like email warnings.
- Select Connect.
NoteOlder connections used a GoDaddy API key and secret instead of a token. GoDaddy stops accepting those at the end of 2026 — if yours still uses one, it keeps working and shows a reminder on its page. Paste a personal access token into the connection to switch over.
2At Hetzner
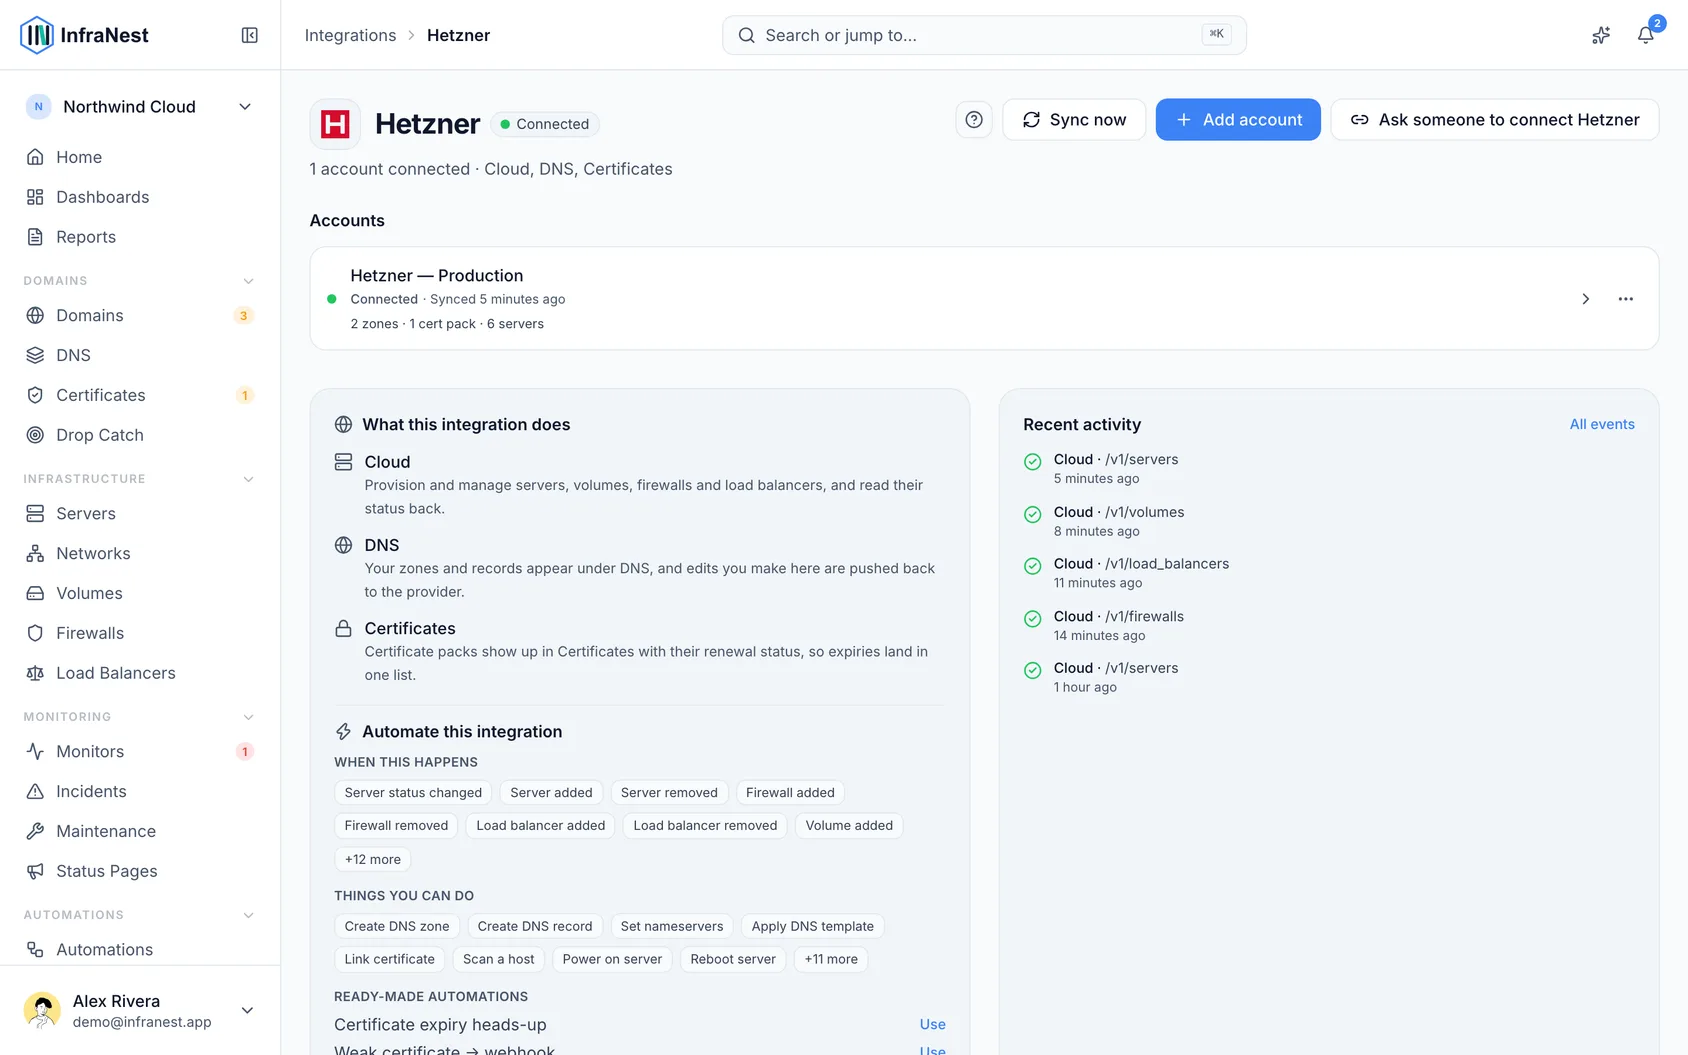
- Sign in to the Hetzner Console (console.hetzner.com). On InfraNest's Hetzner connect form, the Open the token page link will take you straight to your projects.
- Open your project, then go to Security → API Tokens.
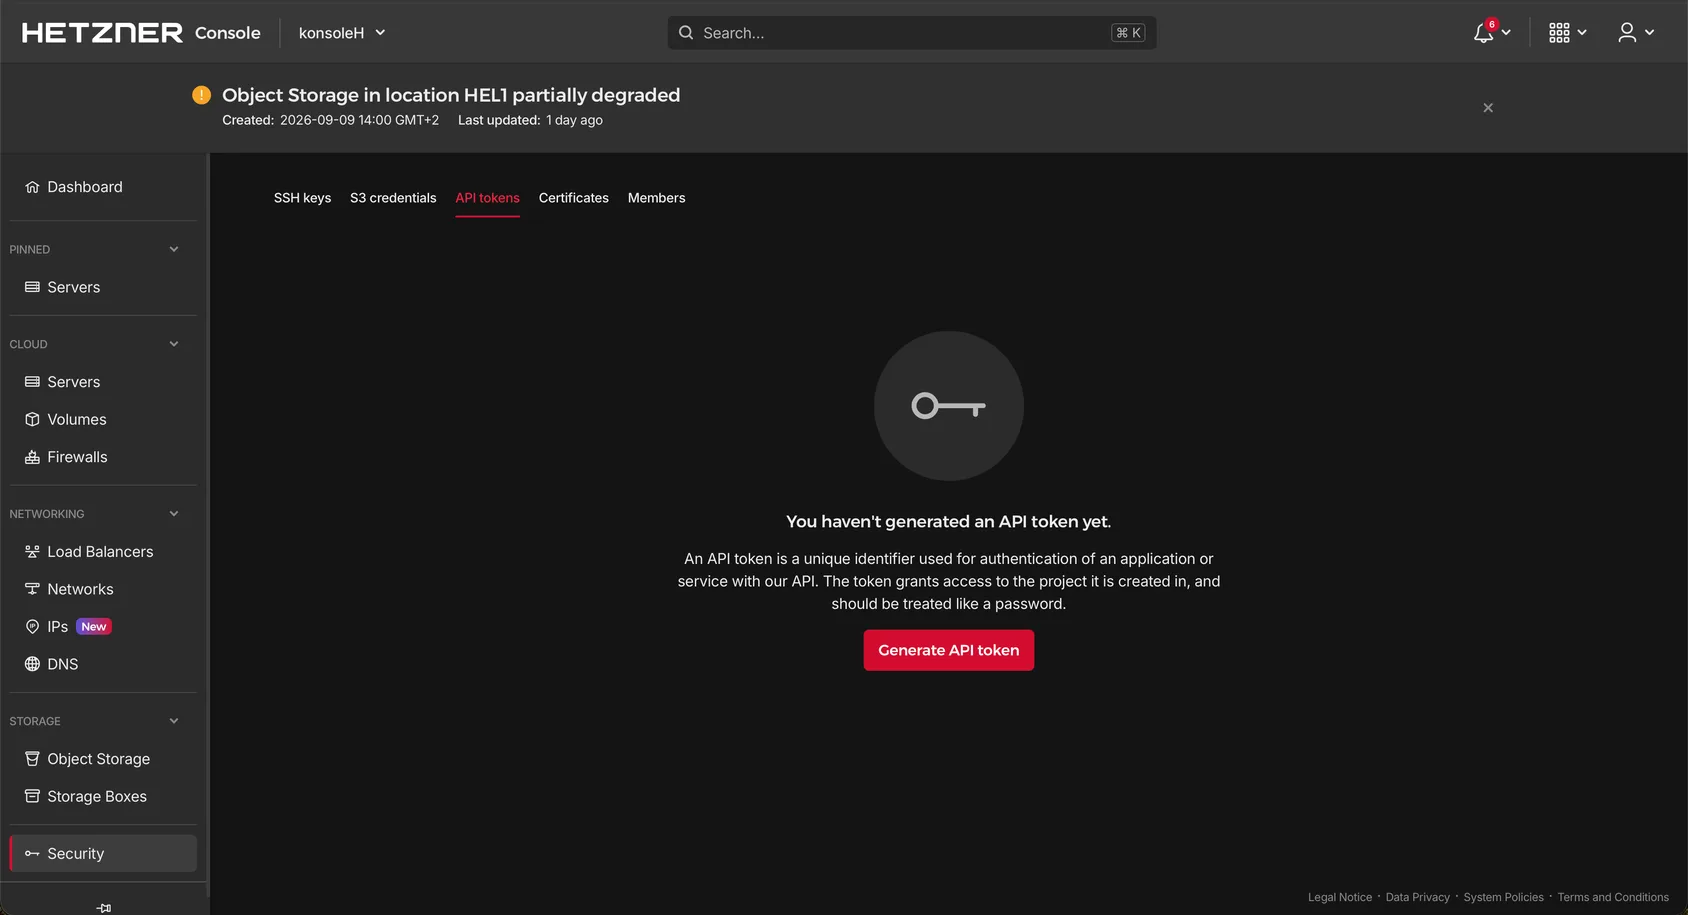
- Select Generate API Token, give it a name (something like "InfraNest" works well), and choose Read & Write.
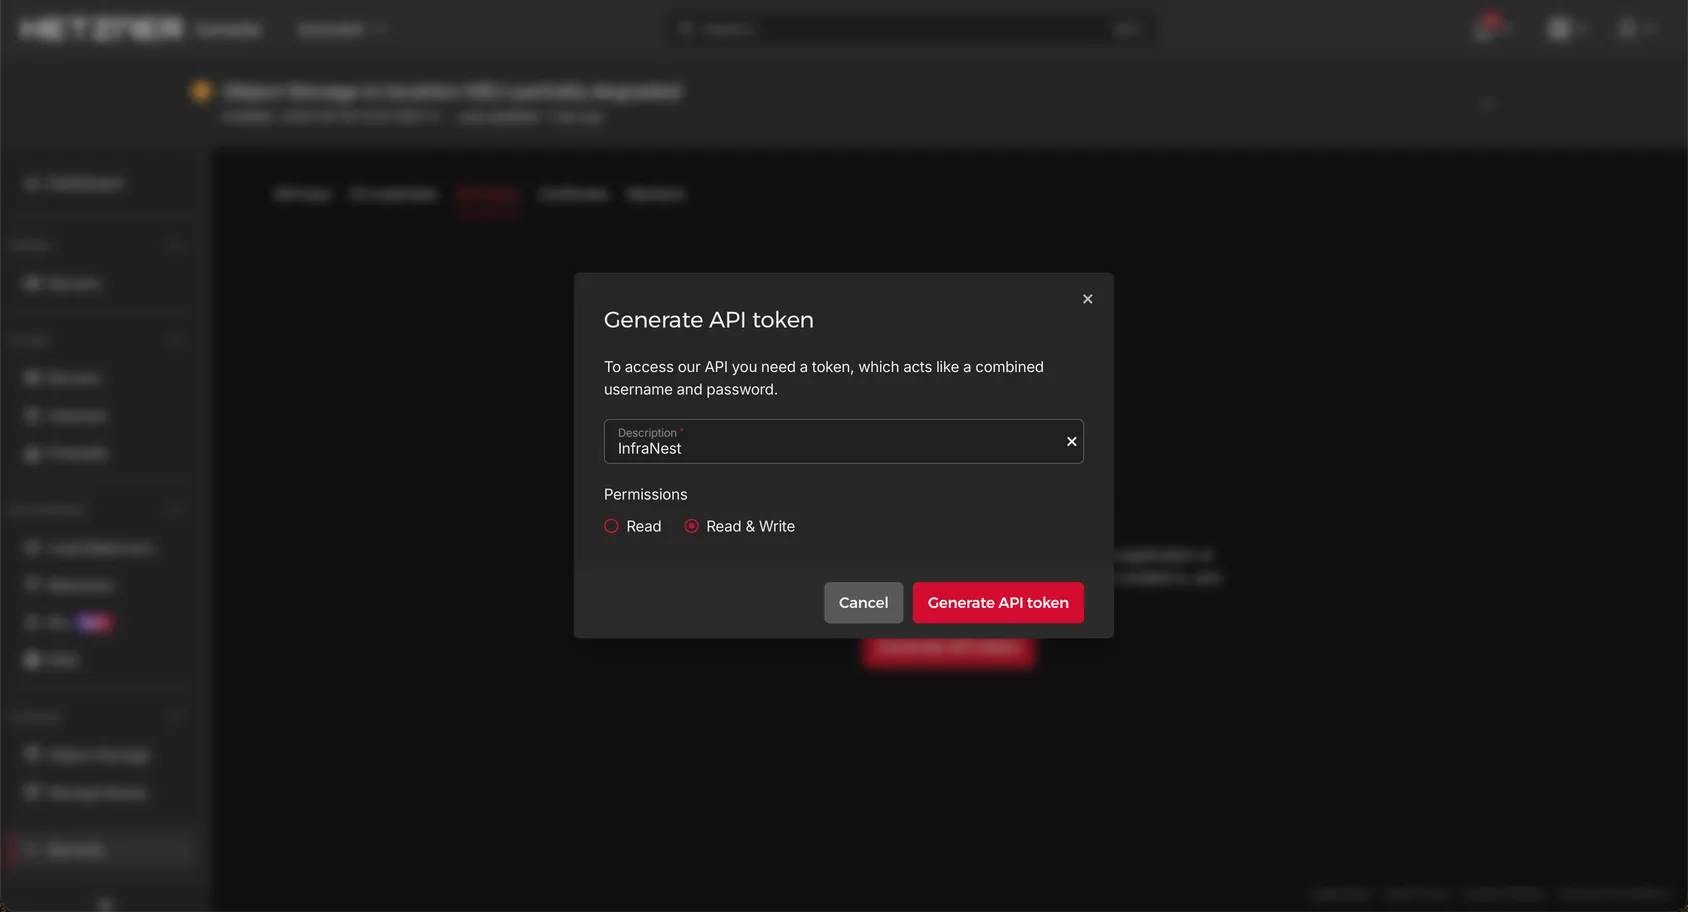
- Copy the token right away — Hetzner only shows it to you once.
WarningChoose Read & Write, not Read. A read-only token lets InfraNest see your resources but not manage them.
3In InfraNest
- Go to Integrations and open Hetzner.
- Give the connection an Account label so you can recognise it later. This is optional.
- Choose which features to use it for: Cloud, DNS and Certificates.
- Paste your API token.
- Leave Email me when this integration has problems ticked if you'd like a heads-up by email if something goes wrong.
- Select Connect.
InfraNest checks the token and starts bringing in your servers and zones straight away.
2At IONOS
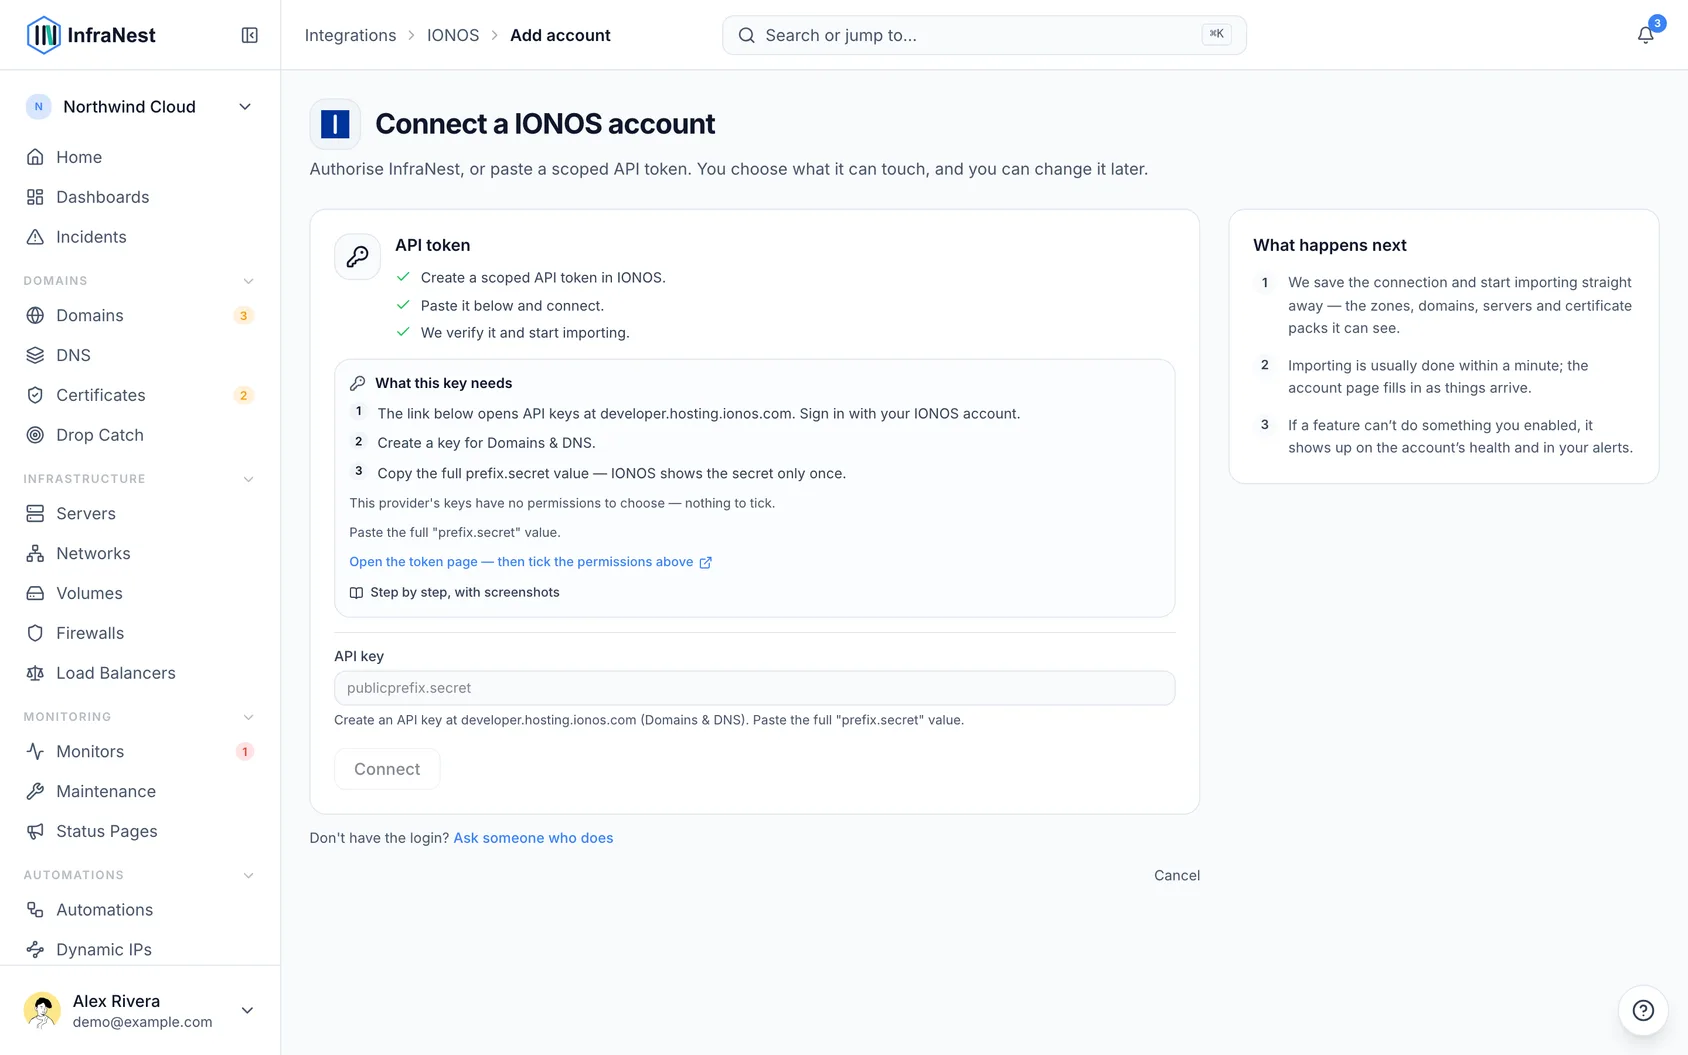
- Go to developer.hosting.ionos.com/keys and sign in. If you're on InfraNest's IONOS connect form, the Open the token page link takes you straight there.
- Create an API key for Domains & DNS.
- Your key has two parts — a prefix and a secret — shown together as
prefix.secret. - Copy the whole value, including the part before the dot. IONOS shows the secret only once, so make sure you capture it now.
WarningCopy the full
prefix.secretvalue. Leaving off the prefix (the part before the dot) is the most common cause of an "authentication failed" error.
3In InfraNest
- Go to Integrations and open IONOS.
- Give the connection an Account label (Optional). Leave it blank and it takes the provider's name — a second connection to the same provider becomes "… (1)", so they stay tellable apart.
- Choose which features to use it for: DNS, Registrar and Certificates.
- Paste your full API key (
prefix.secret). - Leave Email me when this integration has problems ticked if you'd like email warnings.
- Select Connect.
2At Namecheap
Sign in to Namecheap.
Go to Profile → Tools → API Access.
Enable API access. Namecheap may first require a minimum balance or spend on your account before it allows this.
Copy your API key. Your API username is your Namecheap username.
3In InfraNest
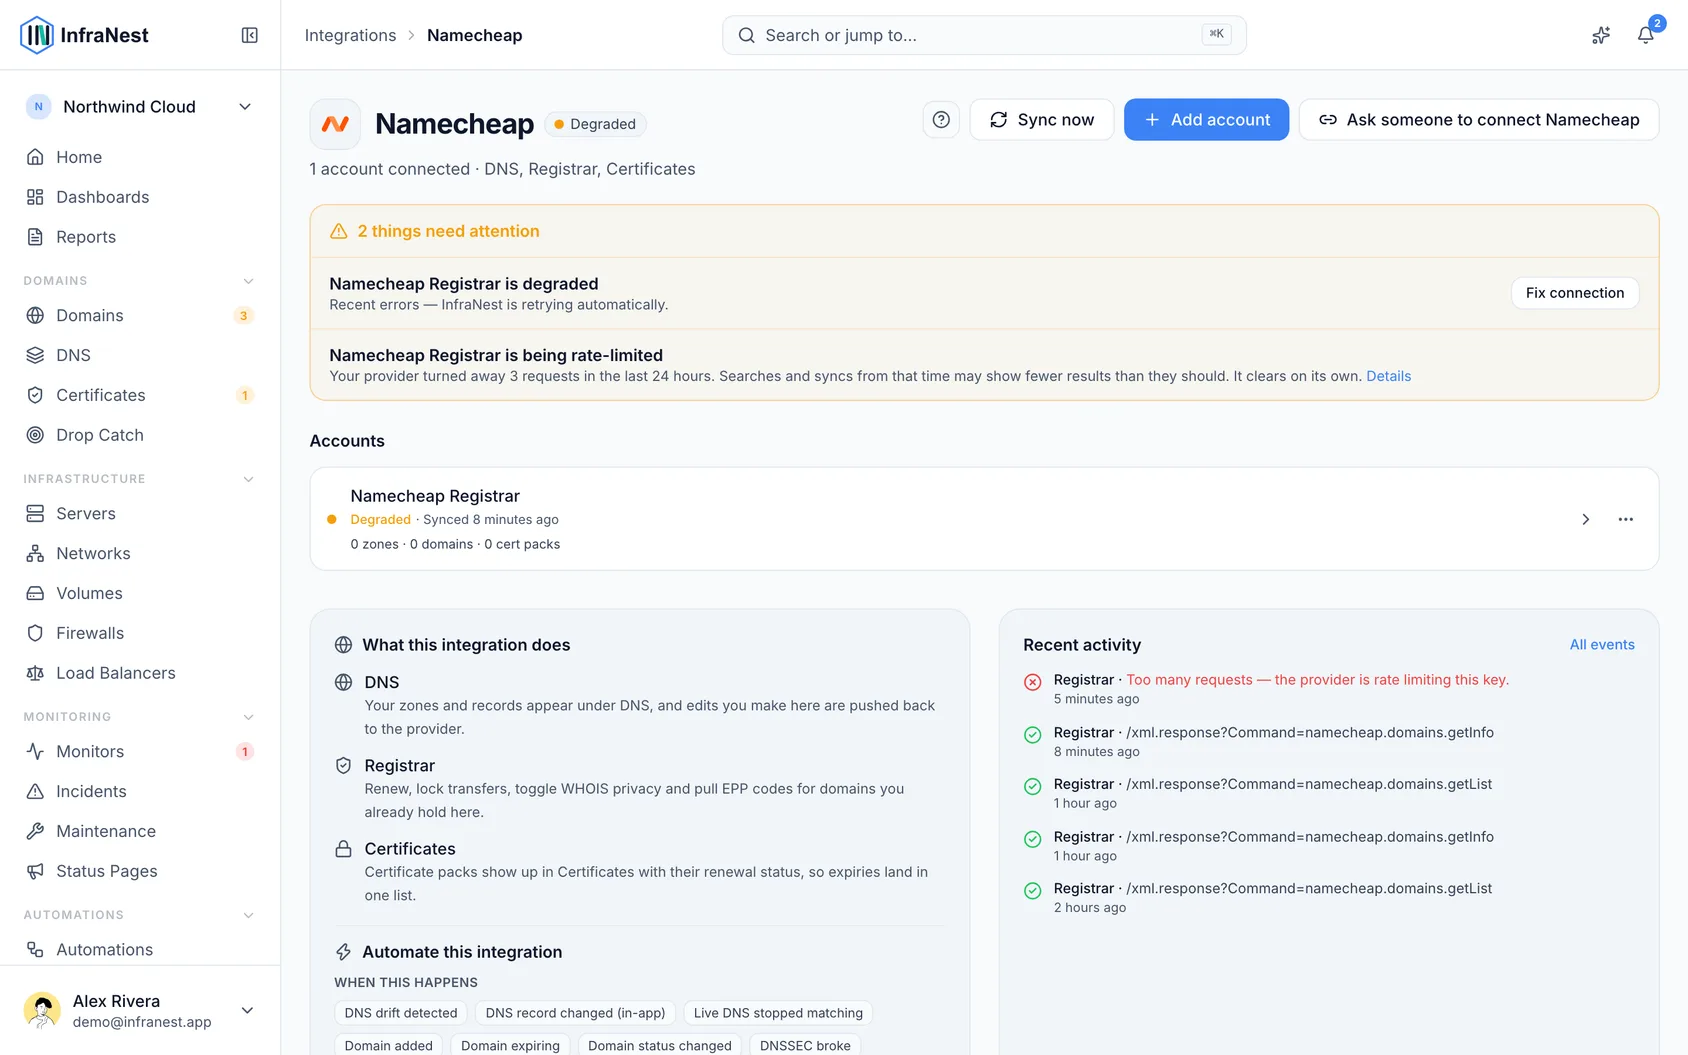
- Go to Integrations and open Namecheap.
- Give the connection an Account label so you can recognise it later — for example, "Main account". This is optional.
- Choose which features to use it for: Registrar, DNS and Certificates. Leave any turned off that you don't need.
- Enter your API Username (your Namecheap username) and API Key. The Whitelisted IP is already filled in, and the box above it says Allow this IP at the provider — check it matches the one you approved in Namecheap. Leave the optional reseller username empty unless Namecheap gave you one.
- Leave Email me when this integration has problems ticked if you'd like a heads-up by email if something goes wrong.
- Select Connect.
InfraNest checks your details and starts bringing in your domains straight away.
2At OpenProvider
- Don't use your own login for this. If someone leaves, or you rotate your own password, a separate user means you can change that without breaking the connection.
- In the Openprovider control panel, go to Account.
- Add a new user for InfraNest.
- Give it a password you haven't used anywhere else — you'll paste this into InfraNest shortly.
3In InfraNest
- Go to Integrations and open Openprovider.
- Give the connection an Account label so you can recognise it later. This is optional, and worth doing if you have more than one Openprovider account.
- Choose which features to use it for: Registrar, DNS and Certificates.
- Enter the API username and Password of the user you created for InfraNest — not your own login. The box above the fields shows the IP address to allow for that user: Allow this IP at the provider: …
- Select Connect.
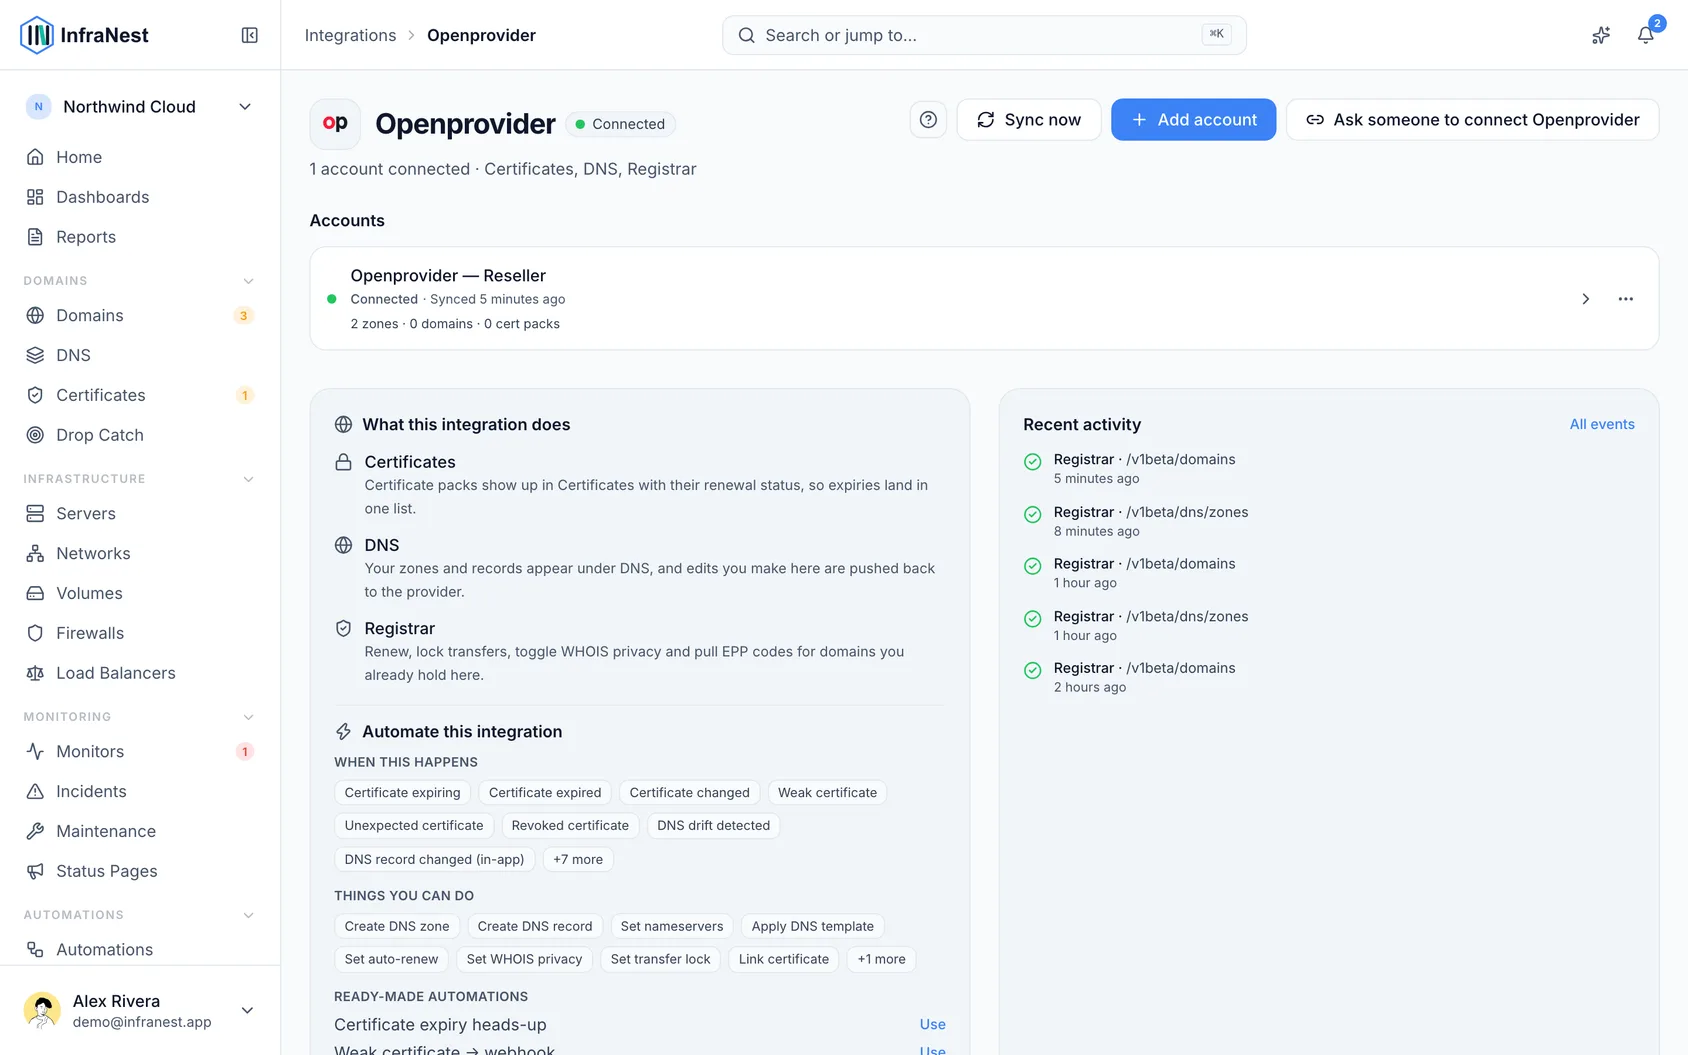
InfraNest checks the credentials and starts importing your domains. A large portfolio takes a few minutes.
2At OVHcloud
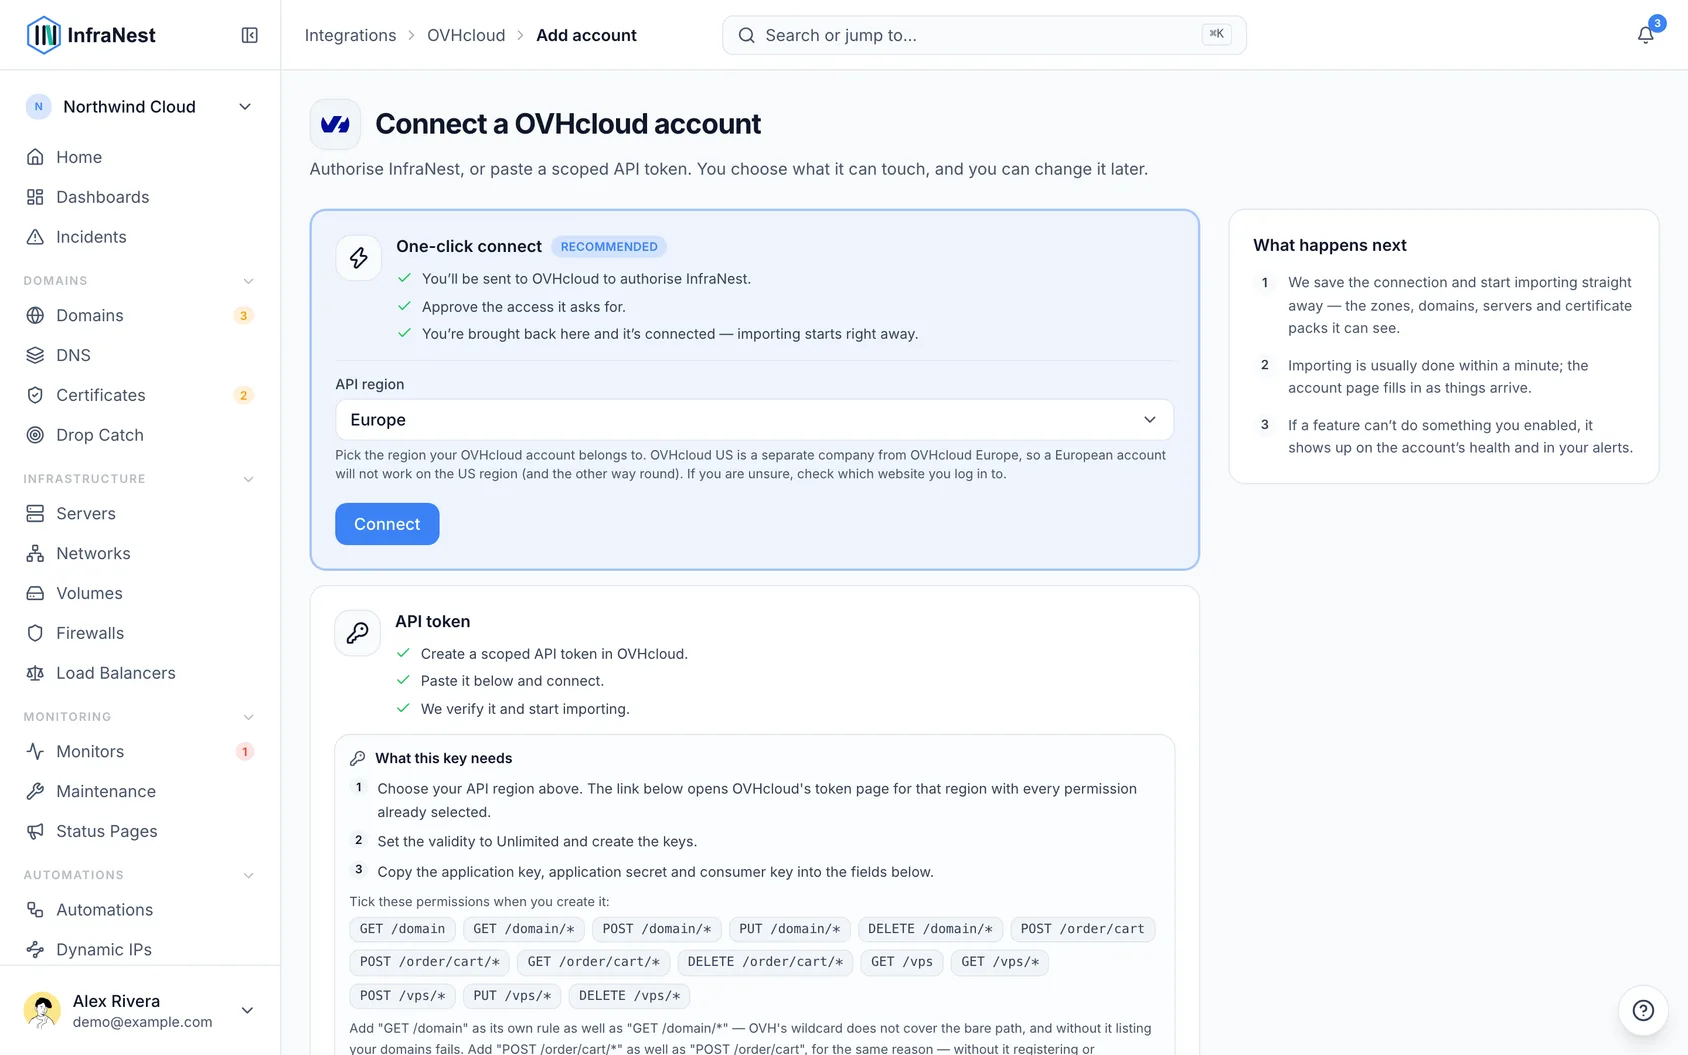
Go to the token page for your region — this must match the region you picked in InfraNest:
- Europe —
eu.api.ovh.com/createToken - Canada / Asia-Pacific —
ca.api.ovh.com/createToken - United States —
api.us.ovhcloud.com/createToken
- Europe —
Sign in with your OVHcloud account.
Fill in a Script name (for example
InfraNest) and a description, so you recognise it later.Set Validity to Unlimited, unless you want to rotate the keys yourself on a schedule.
Under Rights, add the required rows. The link InfraNest gives you opens this page with every row already filled in:
- Domains and DNS:
GET /domain,GET /domain/*,POST /domain/*,PUT /domain/*,DELETE /domain/* - Buying and pricing domains:
POST /order/cart,POST /order/cart/*,GET /order/cart/*,DELETE /order/cart/* - Servers (only if you run VPS at OVHcloud):
GET /vps,GET /vps/*,POST /vps/*,PUT /vps/*,DELETE /vps/*
Note
/domainand/domain/*are two separate rules — the*covers everything below/domain, but not/domainitself. Miss the first row and listing your domains fails while everything else works. The same applies to/order/cartand/vps, which is why each appears twice above.- Domains and DNS:
Select Create keys.
3In InfraNest
- Go to Integrations and open OVHcloud.
- Give the connection an Account label (Optional). Leave it blank and it takes the provider's name — a second connection to the same provider becomes "… (1)", so they stay tellable apart.
- Choose your API region from the list above. It's the first thing both connection methods ask for, because it decides which OVHcloud platform you're signed in to. The region is shown next to the connection's name afterwards, so with an account in two regions you can always tell which is which.
- Select Connect with OVHcloud if you see it, and approve the access OVHcloud asks for. Your region missing from the list on that button? One-click sign-in isn't set up for that platform yet — use the keys instead, which work for every region. See Create OVHcloud API keys.
- Choose which features to use it for: DNS, Registrar (your domains) and Cloud (your VPS). On the United States platform, Registrar isn't offered — OVHcloud US doesn't sell domains.
- Leave Email me when this integration has problems ticked if you'd like email warnings.
- Select Connect.
2At Porkbun
- Sign in to Porkbun.
- Go to Account → API Access (porkbun.com/account/api).
- Select Create API Key and give it a name you'll recognise, such as InfraNest.
- Porkbun shows you an API key starting
pk1_and a Secret API key startingsk1_. - Copy both and paste them into InfraNest — see Connect Porkbun.
WarningThe secret key is shown once. If you lose it, create a new key pair rather than trying to recover it.
3In InfraNest
- Go to Integrations and open Porkbun.
- Give the connection an Account label so you can recognise it later. This is Optional, and worth doing if you have more than one Porkbun account.
- Choose which features to use it for: Registrar, DNS and Certificates.
- Paste your API key (it starts with
pk1_) and your Secret API key (it starts withsk1_). - Select Connect.
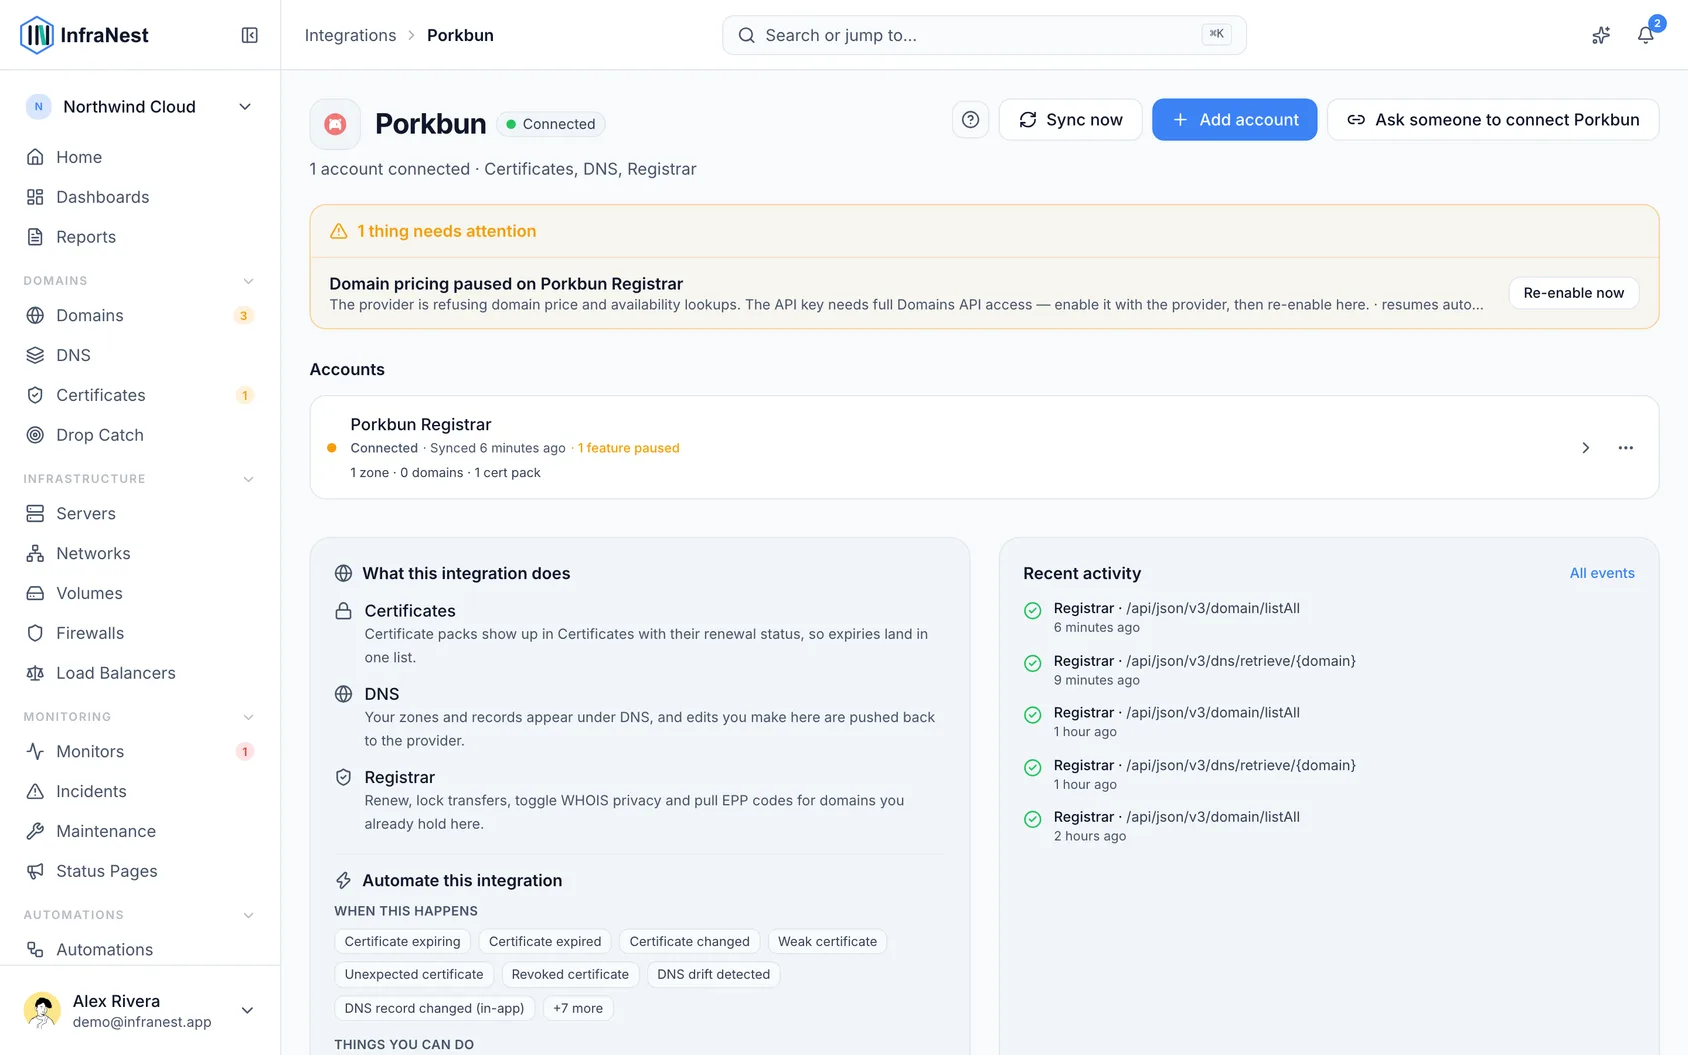
InfraNest checks the credentials and starts importing your domains. It also asks Porkbun to tell it about changes as they happen, so it doesn't need to check as often.
2At TransIP
- Sign in to the TransIP control panel. The Open the token page link on InfraNest's TransIP connect form goes straight to the API page.
- Go to Settings → API.
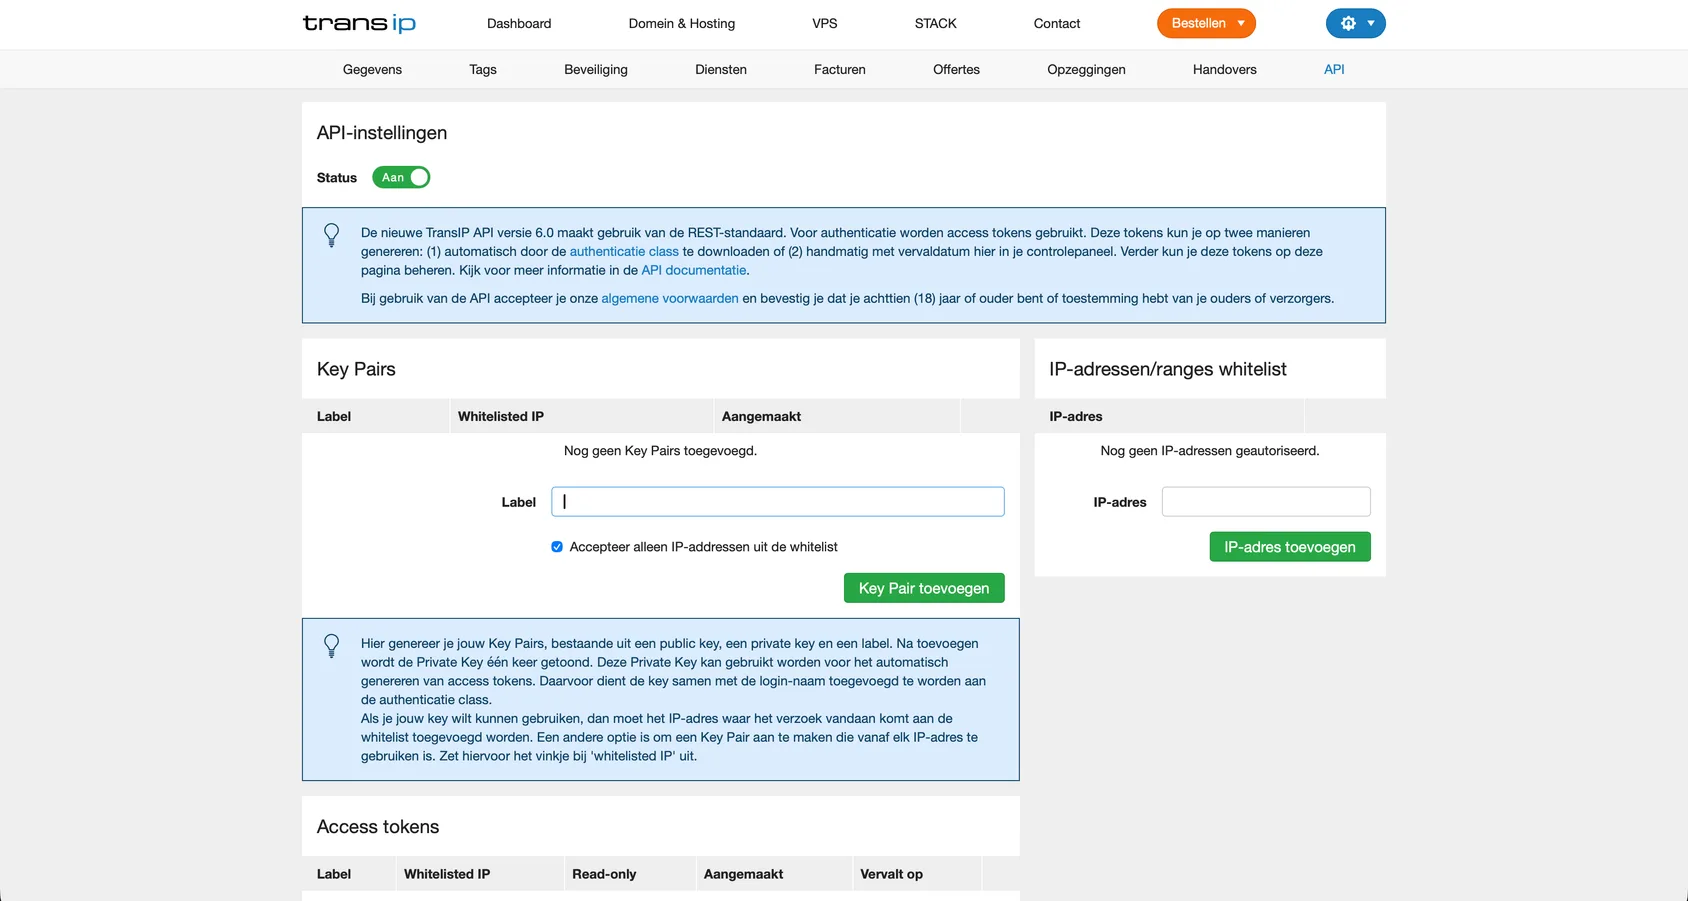
- Switch the API Status on. Under Key Pairs, give the key a label such as InfraNest, untick Accept only IP addresses from the whitelist — it is ticked by default — and select Add Key Pair.
WarningInfraNest doesn't connect from one fixed address, so if you leave the whitelist option ticked, your key will be refused.
- Copy the private key, including the
-----BEGINand-----ENDlines.
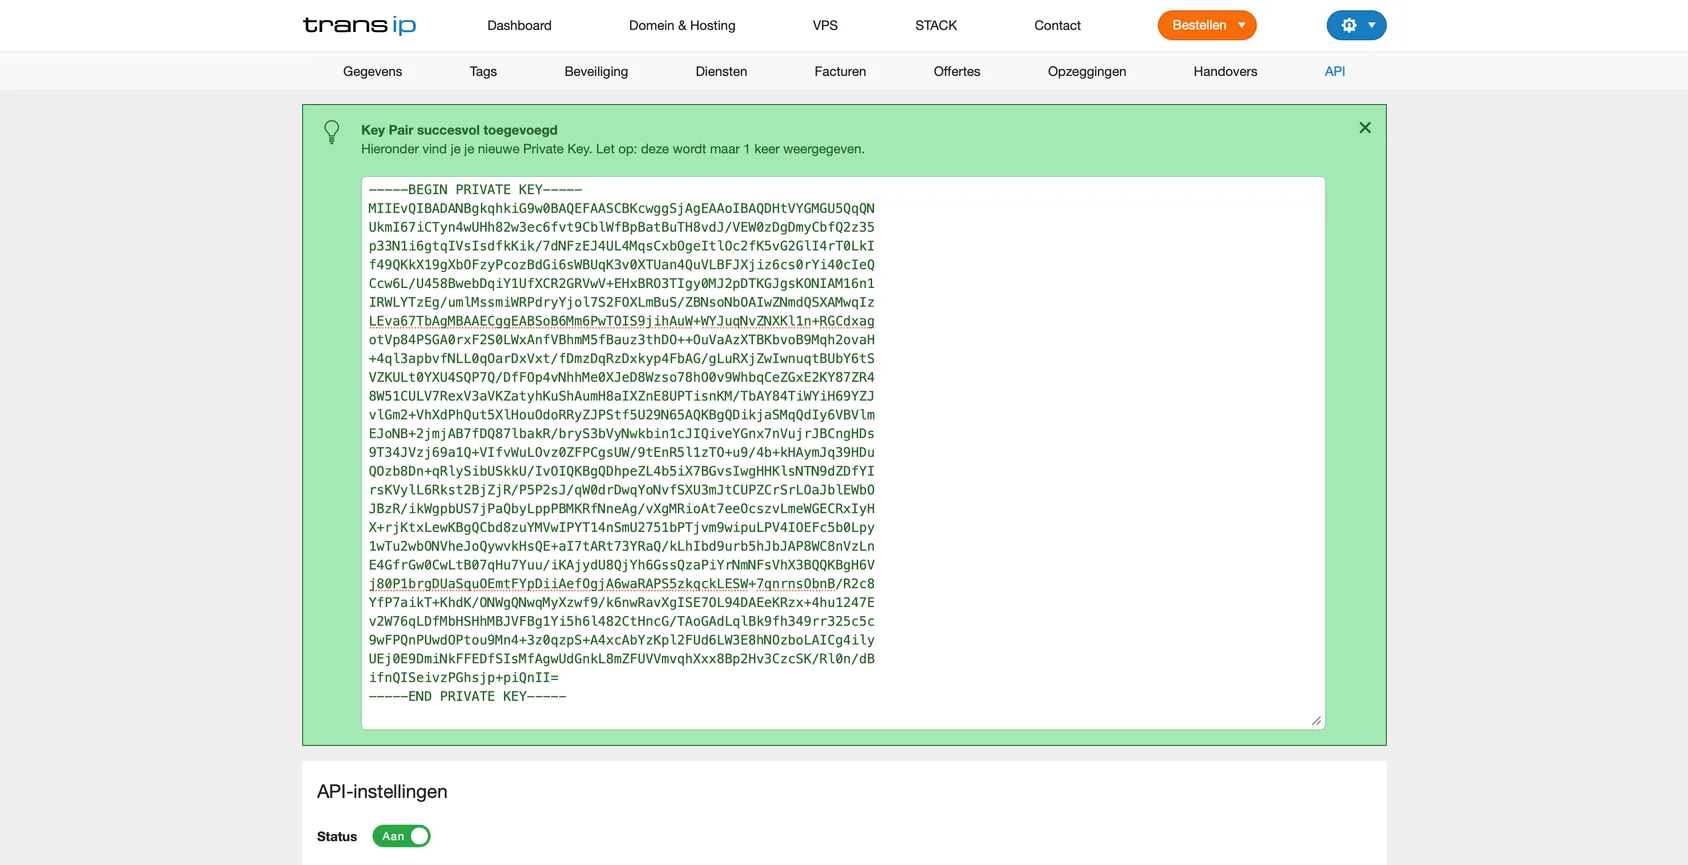
NoteTransIP shows you this private key only once. If you lose it, you'll need to create a new key pair.
- Note your account name (your TransIP username) — you'll need it too.
3In InfraNest
- Go to Integrations and open TransIP.
- Give the connection an Account label (optional). Leave it blank and it takes the provider's name — a second connection to the same provider becomes "… (1)", so they stay tellable apart.
- Choose which features to use it for: Cloud, DNS, Registrar and Certificates.
- Enter your Account name and paste your RSA Private Key, including the
BEGINandENDlines. - Leave Email me when this integration has problems ticked if you'd like email warnings.
- Select Connect.